

DstackApp contract keeps a list of the physical nodes that are allowed to run your application. If a node is not on that list, the KMS will refuse to hand it keys — and your CVM cannot boot there.
This page is for operators of an already-deployed Onchain KMS app. It covers how device identity works, how to view the allowlist, how to add and remove nodes from the CLI and the dashboard, and how to recover when a node’s identity changes after a hardware upgrade.
If you have not deployed an Onchain KMS app yet, start with Deploying with Onchain KMS. For the conceptual model behind compose_hash and device_id, see Understanding Onchain KMS.
Why Device Identity Matters
Onchain KMS decides whether to release keys based on three things: the TEE attestation quote, the code that is running (compose_hash), and the physical node the code is running on (device_id). All three must match values that your DstackApp contract considers valid.
The device check is the one most operators overlook. When your CVM is created on node A, the deployment flow registers node A’s device_id in the allowlist for you. But if you later replicate the CVM to node B for high availability, migrate it to node C after a hardware failure, or the same node’s underlying identity changes after a BIOS update, the KMS will look up the new device_id on-chain, find it missing, and deny the key request. The CVM will fail to boot and you will see a device-not-allowed rejection in the boot log.
Managing the allowlist is therefore a routine operational task whenever you change where your app runs. It is also the main knob for auditability: the allowlist, together with the on-chain events emitted when it changes, gives you a cryptographic record of exactly which machines were ever authorized to run your code.
What a device_id Is
Every Intel TDX host exposes a Platform Provisioning ID (PPID) — a hardware-level identifier derived from the CPU and the platform’s provisioning keys. Two different machines have different PPIDs. The same machine, under normal operation, keeps the same PPID across reboots.
Phala Cloud surfaces each node’s PPID to the workspaces that are allowed to deploy to it. PPID is not a global public directory — you can see the PPID and device_id of the nodes listed in your own workspace’s deployable node list (for example, in the node picker inside the create-CVM wizard). Nodes you cannot deploy to are not exposed.
Phala Cloud and the DstackApp contract never store the raw PPID on-chain. Instead they store the SHA-256 hash of the PPID bytes — device_id = sha256(ppid). This derivation is implemented in dstack’s attestation library (dstack-attest/src/attestation.rs) and is the same value that Phala Cloud surfaces in the node list, writes to the DstackApp.allowedDeviceIds mapping, and checks at boot time.
This derivation gives you:
- A fixed-length 32-byte value, represented as a 64-character hex string off-chain and as
bytes32on-chain. - A stable one-to-one mapping: one physical node corresponds to one
device_idunder normal operation. - No reversibility: the on-chain value does not leak the PPID to third parties.
When device_id Changes
The PPID is not completely immutable. It can change when the platform’s provisioning state changes — most commonly after:
- A BIOS firmware update
- A CPU microcode update
- Some motherboard replacements or TDX re-provisioning events
sha256(new_ppid) changes too, so the node presents a new device_id the next time it asks KMS for keys. Phala Cloud keeps an internal history of per-node device identity changes so operators can audit when a node’s identity changed, but the on-chain contract does not know about the old-to-new mapping. Any CVMs whose allowlist still points at the stale device_id will need the new one added before they can boot again.
A
device_id change is not a security incident on its own — it is an expected consequence of firmware maintenance. It only becomes a problem because an allowlist entry that used to match the node no longer matches it.The On-Chain Allowlist Model
TheDstackApp contract stores two pieces of state that control device access:
allowedDeviceIds(bytes32) → bool— a mapping fromdevice_idto whether that device is allowed.allowAnyDevice() → bool— a bypass flag. Whentrue, the per-device mapping is ignored and any node in the KMS’s scope is allowed.
owner. The following functions all revert if called by anyone other than the owner:
Viewing the Current Allowlist
You have three independent ways to look at the state of the allowlist. They should always agree; if they do not, trust the on-chain view.Dashboard
Open your app in the Phala Cloud dashboard athttps://cloud.phala.com/<workspace>/apps/<app-address> and scroll the app overview page to the Device Allowlist section in the right sidebar.
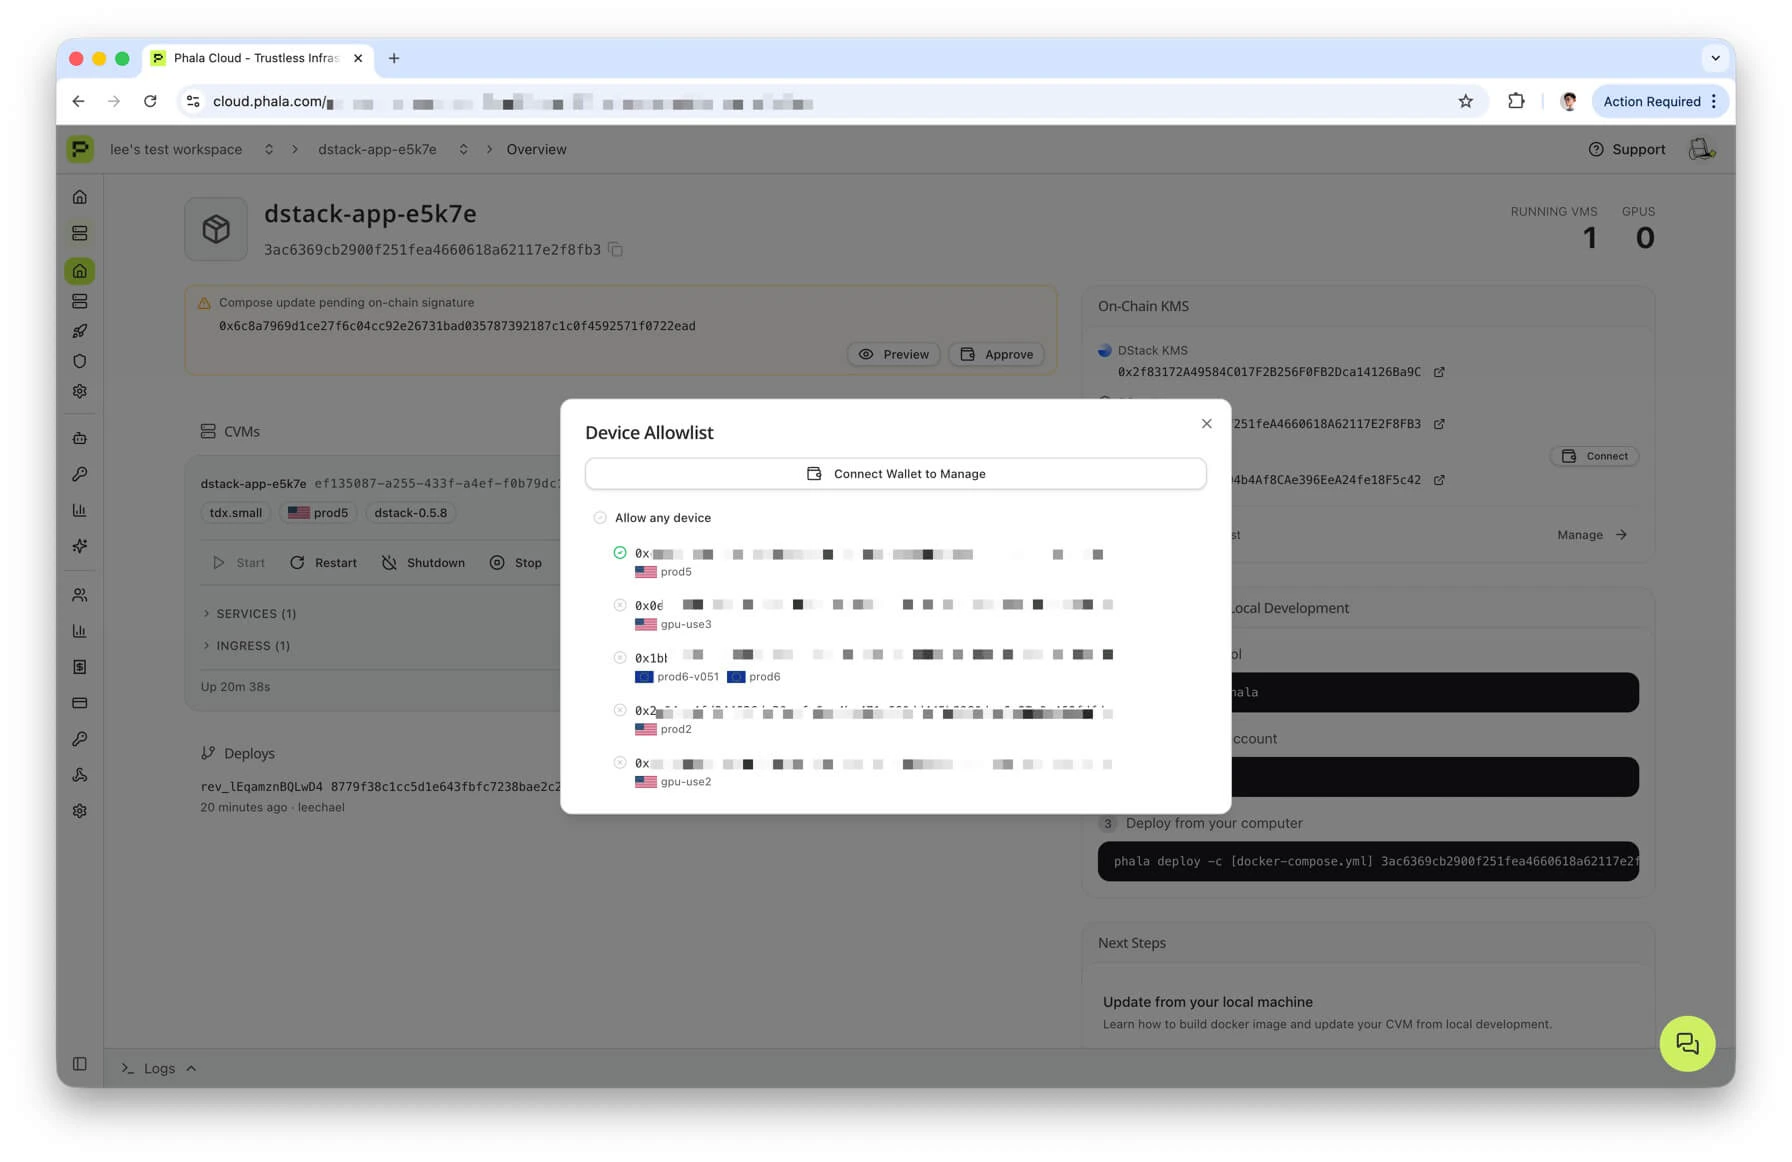
device_id of every node your CVMs are actually running on. If any deployed node is missing from the allowlist — including the common case where a BIOS or microcode update silently drifted a node’s PPID — a warning banner appears at the top of the section, and the offending rows are highlighted so you can act on them without having to hunt for the mismatch.
The panel shows:
- An Allow any device row at the top. When on, the contract’s
allowAnyDeviceflag istrueand the per-device toggles below are effectively ignored. - One row per known device. The list is merged from two sources — devices your CVMs are currently running on (whether or not they are allowed) and devices on nodes your workspace can deploy to. Each row shows the 32-byte
device_id(click to copy), the node name with a region flag where available, and a status icon: green check for allowed, amber triangle for deployed-but-not-allowed, grey X for known-but-not-deployed.
CLI
<cvm_or_app_id> can be a CVM UUID, a CVM name, an instance_id, or an app_id (raw hex or app_ prefixed). The command resolves it to the underlying DstackApp contract and queries the chain directly.
Example output:
allowAnyDevice is on, the per-device table is not printed (the underlying read would just echo every queried ID back without meaning).
You can pass --rpc-url <URL> (or set ETH_RPC_URL) to use a specific RPC endpoint. list never signs anything, so --private-key is not required.
For machine-readable output, pass --json.
On-Chain (Independent Verification)
Because the contract is public, anyone can read the allowlist directly without going through Phala Cloud. On Basescan or Etherscan, open your app contract, switch to Contract → Read Contract, and call:allowAnyDevice()— returnstrueorfalse.allowedDeviceIds(bytes32)— paste the 32-bytedevice_id(with the0xprefix) and read the boolean result.
Adding and Removing Devices from the CLI
All write commands need two things:- A signing key with enough gas on the target chain. Pass
--private-key 0x…or setPRIVATE_KEYin your environment. - An RPC URL for the chain. Pass
--rpc-url <URL>or setETH_RPC_URL. If omitted, the CLI falls back to the chain’s public default RPC, which is frequently rate-limited; use a dedicated RPC for anything beyond a quick experiment.
--wait flag. Without --wait, the command returns as soon as the transaction is submitted. With --wait, it polls the RPC until the on-chain state reflects the change (or times out after roughly one minute).
Add a Device
<device> can be either a node name (as shown by phala nodes ls, for example prod6 or use2) or a 32-byte hex string (with or without 0x). When you pass a node name, the CLI looks it up against your workspace’s deployable-node list and resolves it to the node’s current device_id. Ambiguous names are rejected rather than guessed.
<name> <device_id>), lets you multi-select, then submits one addDevice(bytes32) transaction per selection.
Successful output looks like:
addDevice(bytes32 deviceId). The contract emits DeviceAdded(deviceId) on success.
Remove a Device
allowed by the backend:
removeDevice(bytes32 deviceId). The contract emits DeviceRemoved(deviceId).
Removing a device while
allowAnyDevice is true has no practical effect — the bypass flag still lets the node boot. The CLI warns about this when you use --wait:Enable or Disable the “Allow Any Device” Bypass
--enable or --disable; the command refuses to run otherwise. Underlying call: setAllowAnyDevice(bool). The contract emits AllowAnyDeviceSet(allowAny).
disallow-any is a shortcut that only turns the flag off:
allow-any --disable. Use whichever reads better in your runbooks.
toggle-allow-any flips the current state (or forces it with --enable / --disable):
allowAnyDevice value from the backend and sends a transaction to set the opposite. Pass --enable or --disable if you want to assert a specific end state instead of toggling.
Multi-Replica and HA Patterns
When an app runs on more than one node — whether for geographical redundancy, scaling, or active failover — you have two broad strategies:Option A: Precise Allowlist
Maintain a per-node allowlist usingaddDevice and removeDevice. Every node the app is allowed to run on has an explicit on-chain entry.
- Pros. You get a cryptographic audit trail of exactly which physical machines were ever authorized to execute your app. Removing a node is a provable, on-chain event. This is the strongest model for compliance-sensitive workloads and for auditors that want to reason about the blast radius of a compromise.
- Cons. Operational overhead. Adding capacity is a signed transaction; so is rotating out a failed node; so is recovering from a BIOS-driven
device_idchange.
Option B: allowAnyDevice = true
Flip the bypass flag. The contract stops checking allowedDeviceIds and permits any Phala Cloud node attached to this KMS to host the app. The “any” is scoped to hosts that the KMS already considers trusted — hosts that have passed dstack-KMS onboarding and are part of the Phala Cloud fleet — not any random TEE machine on the internet.
- Pros. You can scale freely across any Phala Cloud node without touching the allowlist. No per-migration overhead.
- Cons. Weaker audit guarantees. Any Phala Cloud host the KMS considers trusted can attempt to run your app, and your on-chain record no longer pins execution to a specific set of machines.
Recovering from a Hardware Upgrade
When a node’s PPID changes after a BIOS, microcode, or platform update, any CVM whose allowlist entry still references the olddevice_id will stop booting there.
Symptoms.
- CVMs on the affected node fail to start or fail to obtain keys on the next reboot.
- The boot log or the dashboard warning banner reports that the node’s
device_idis not on the allowlist. phala allow-devices list <cvm_or_app_id>does not include the node’s currentdevice_id.
- Look up the node’s new
device_idby runningphala nodes ls. The output shows one row per deployable node, including the currentdevice_idafter any drift. The quickest path is to either remember the node name (for exampleprod6) or copy the new 32-byte hex value. - Add the node back to the app’s allowlist. You can pass either the node name or the raw
device_id:The CLI resolvesprod6against your workspace’s node list and submitsaddDevice(bytes32)with the node’s currentdevice_id. If you prefer to be explicit, pass the 32-byte hex value instead: - The dashboard’s Device Allowlist section is the fastest way to check the result — open
https://cloud.phala.com/<workspace>/apps/<app-address>, and the warning banner for this node should be gone. - Restart the CVM on the affected node. It should now complete the KMS handshake and boot successfully.
- Optionally, remove the old
device_idwithphala allow-devices removeonce you are sure nothing else needs it.
addDevice transaction in advance of the maintenance.
Non-EOA Owner
Next Steps
- Deploying with Onchain KMS — the prerequisite for everything on this page. Covers the first-time deploy of a
DstackAppcontract and its initialdevice_id/compose_hashregistration. - Multisig and Governance — how to operate an app whose owner is a Safe, a timelock, or a DAO, including the manual path for device operations when the CLI’s
--private-keyflow cannot be used.