

Prerequisites
- Phala Cloud account with sufficient credits
- Basic familiarity with LLM deployment
Step 1: Deploy your model
Access the deployment page
Sign in to your Phala Cloud account and select Confidential AI Models from the top navigation bar.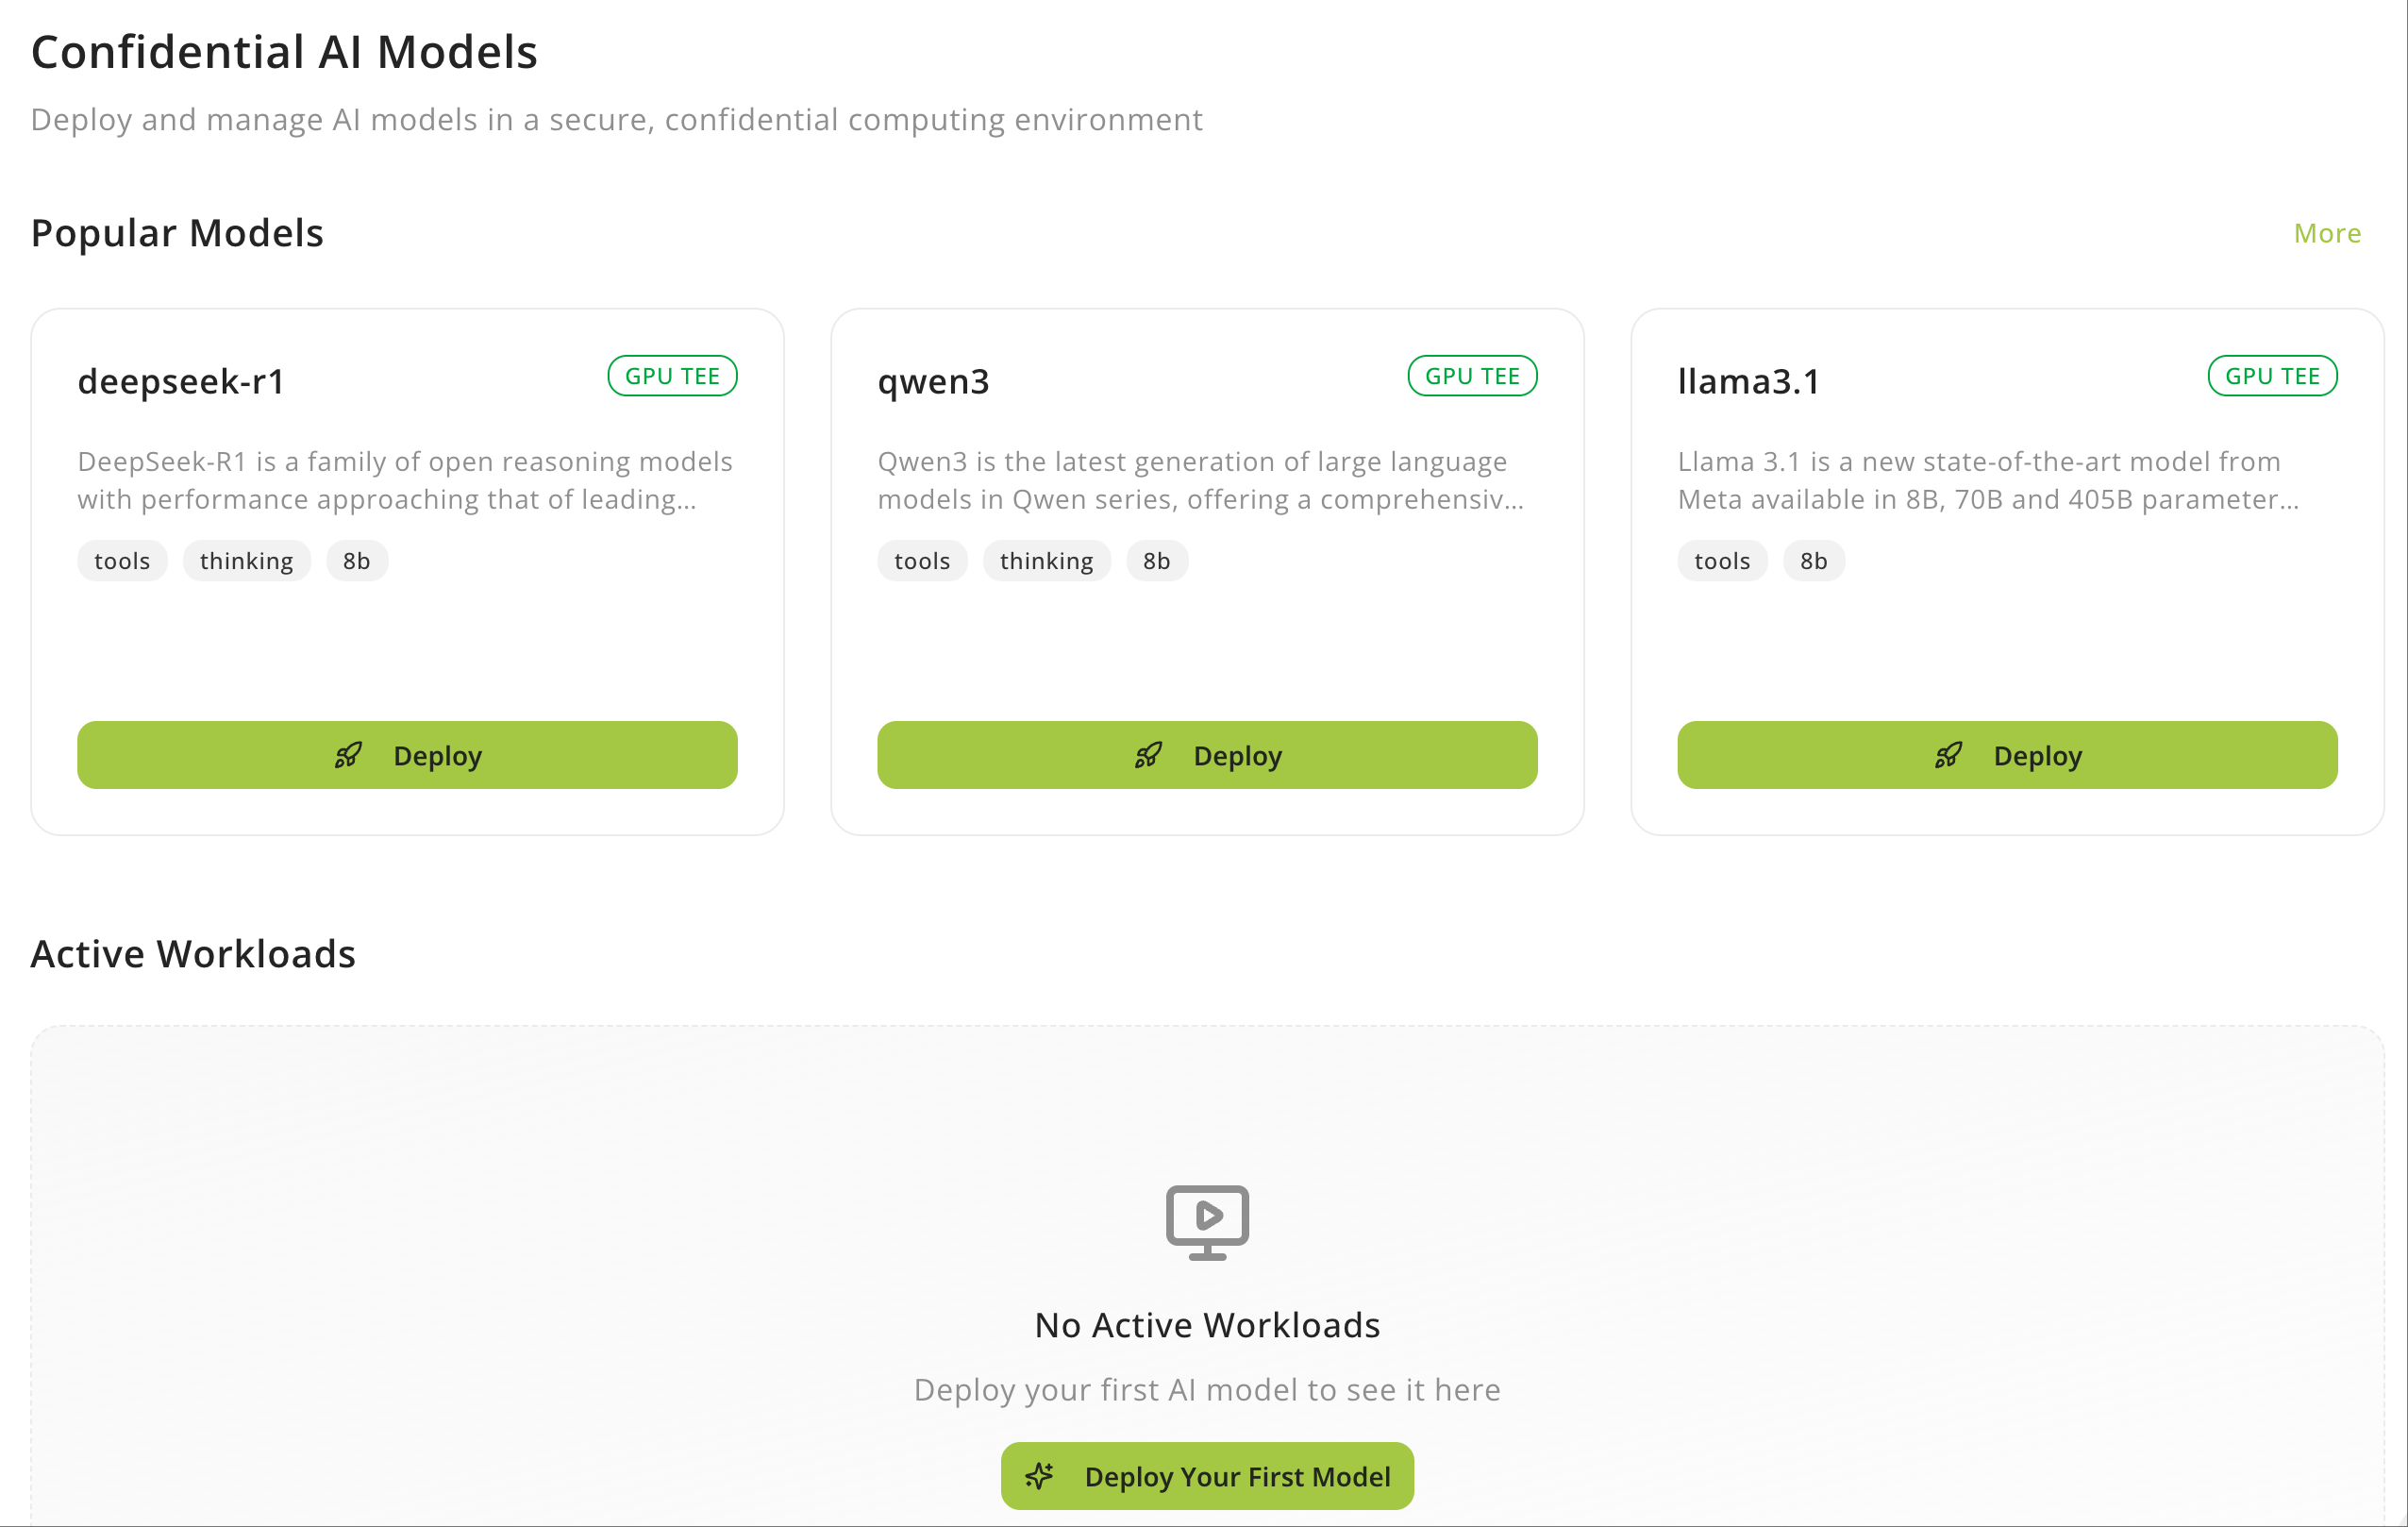
Choose a model
Locate the model you want to deploy (e.g.,qwen-2.5-7b-instruct) and click Deploy to open the deployment wizard. Review the model description to understand its capabilities. For example, Qwen 2.5 models are instruction-tuned language models optimized for chat and task completion.
Don’t see your preferred model? We can add custom models—reach out through Support.
Configure deployment
Fill out the deployment form with these details: Service Name: Give your deployment a memorable name (e.g.,qwen-2-5-7b-instruct). Use the auto-generated name or create your own.
Node & Image: Select your preferred deployment location and image version. Available options depend on current capacity (e.g., gpu1 us-west-1 with dstack-nvidia-0.5.0).
Resource Plan: Review the hardware allocation for your chosen model. For example, qwen-2.5-7b-instruct typically includes:
- H200 GPU with 141 GB VRAM
- 24 vCPUs
- 256 GB RAM
- 40 GB disk
- $3.20 per hour pricing
Launch the deployment
Review your configuration and click Deploy to launch. Provisioning takes a few minutes.
- Preparing: Allocating resources
- Starting: Launching the model
- Running: Ready to use
Step 2: Access Open WebUI
Once your model reaches Running status, you can access it through Open WebUI, a browser-based chat interface.Open the interface
When the workload shows RUNNING status, a Connect UI button appears under the model card. The button initially reads “Initializing…” while the interface loads. Click it when active to open a new tab.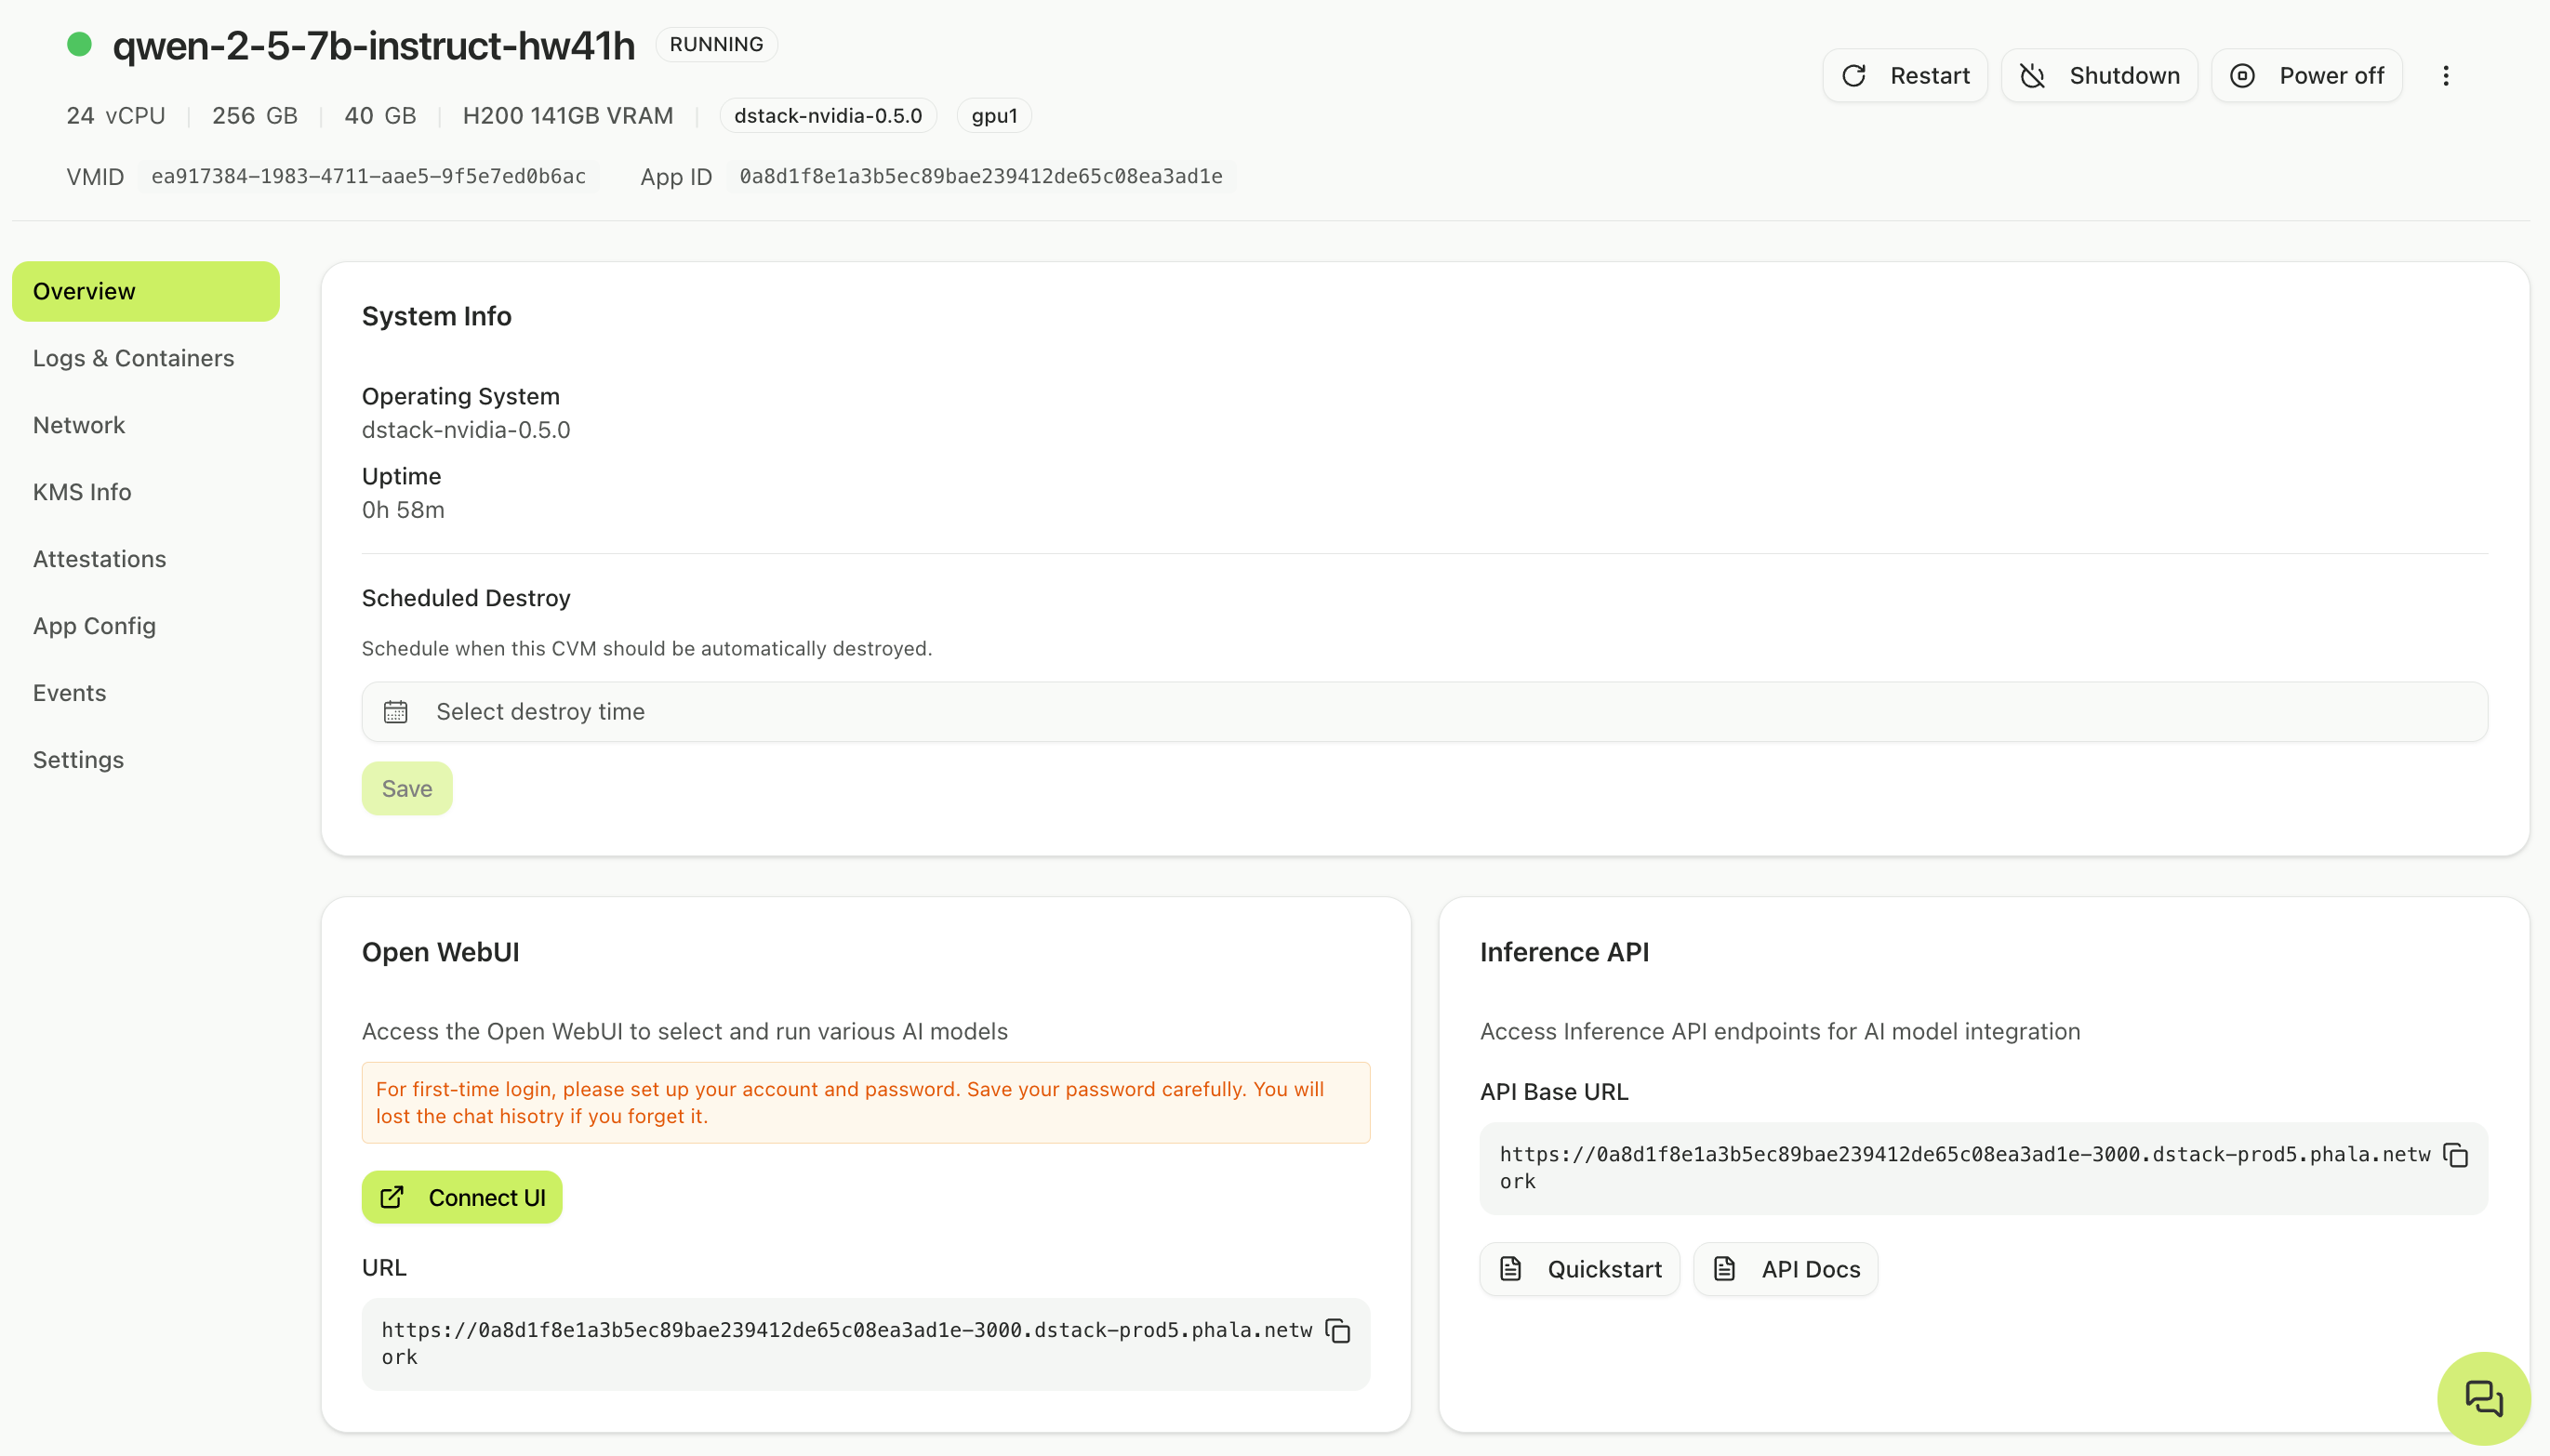
Create admin account
On your first visit, create an admin account with your name, email, and password. Click Create Admin Account to continue. After account creation, click Okay, Let’s Go! to access the chat interface.Step 3: Interact with your model
Open WebUI provides a standard chat interface. Type your questions in the prompt box, manage conversation history in the left sidebar, and use the tools menu (+) for advanced features like file uploads. The interface is intuitive and works like other chat applications you may be familiar with.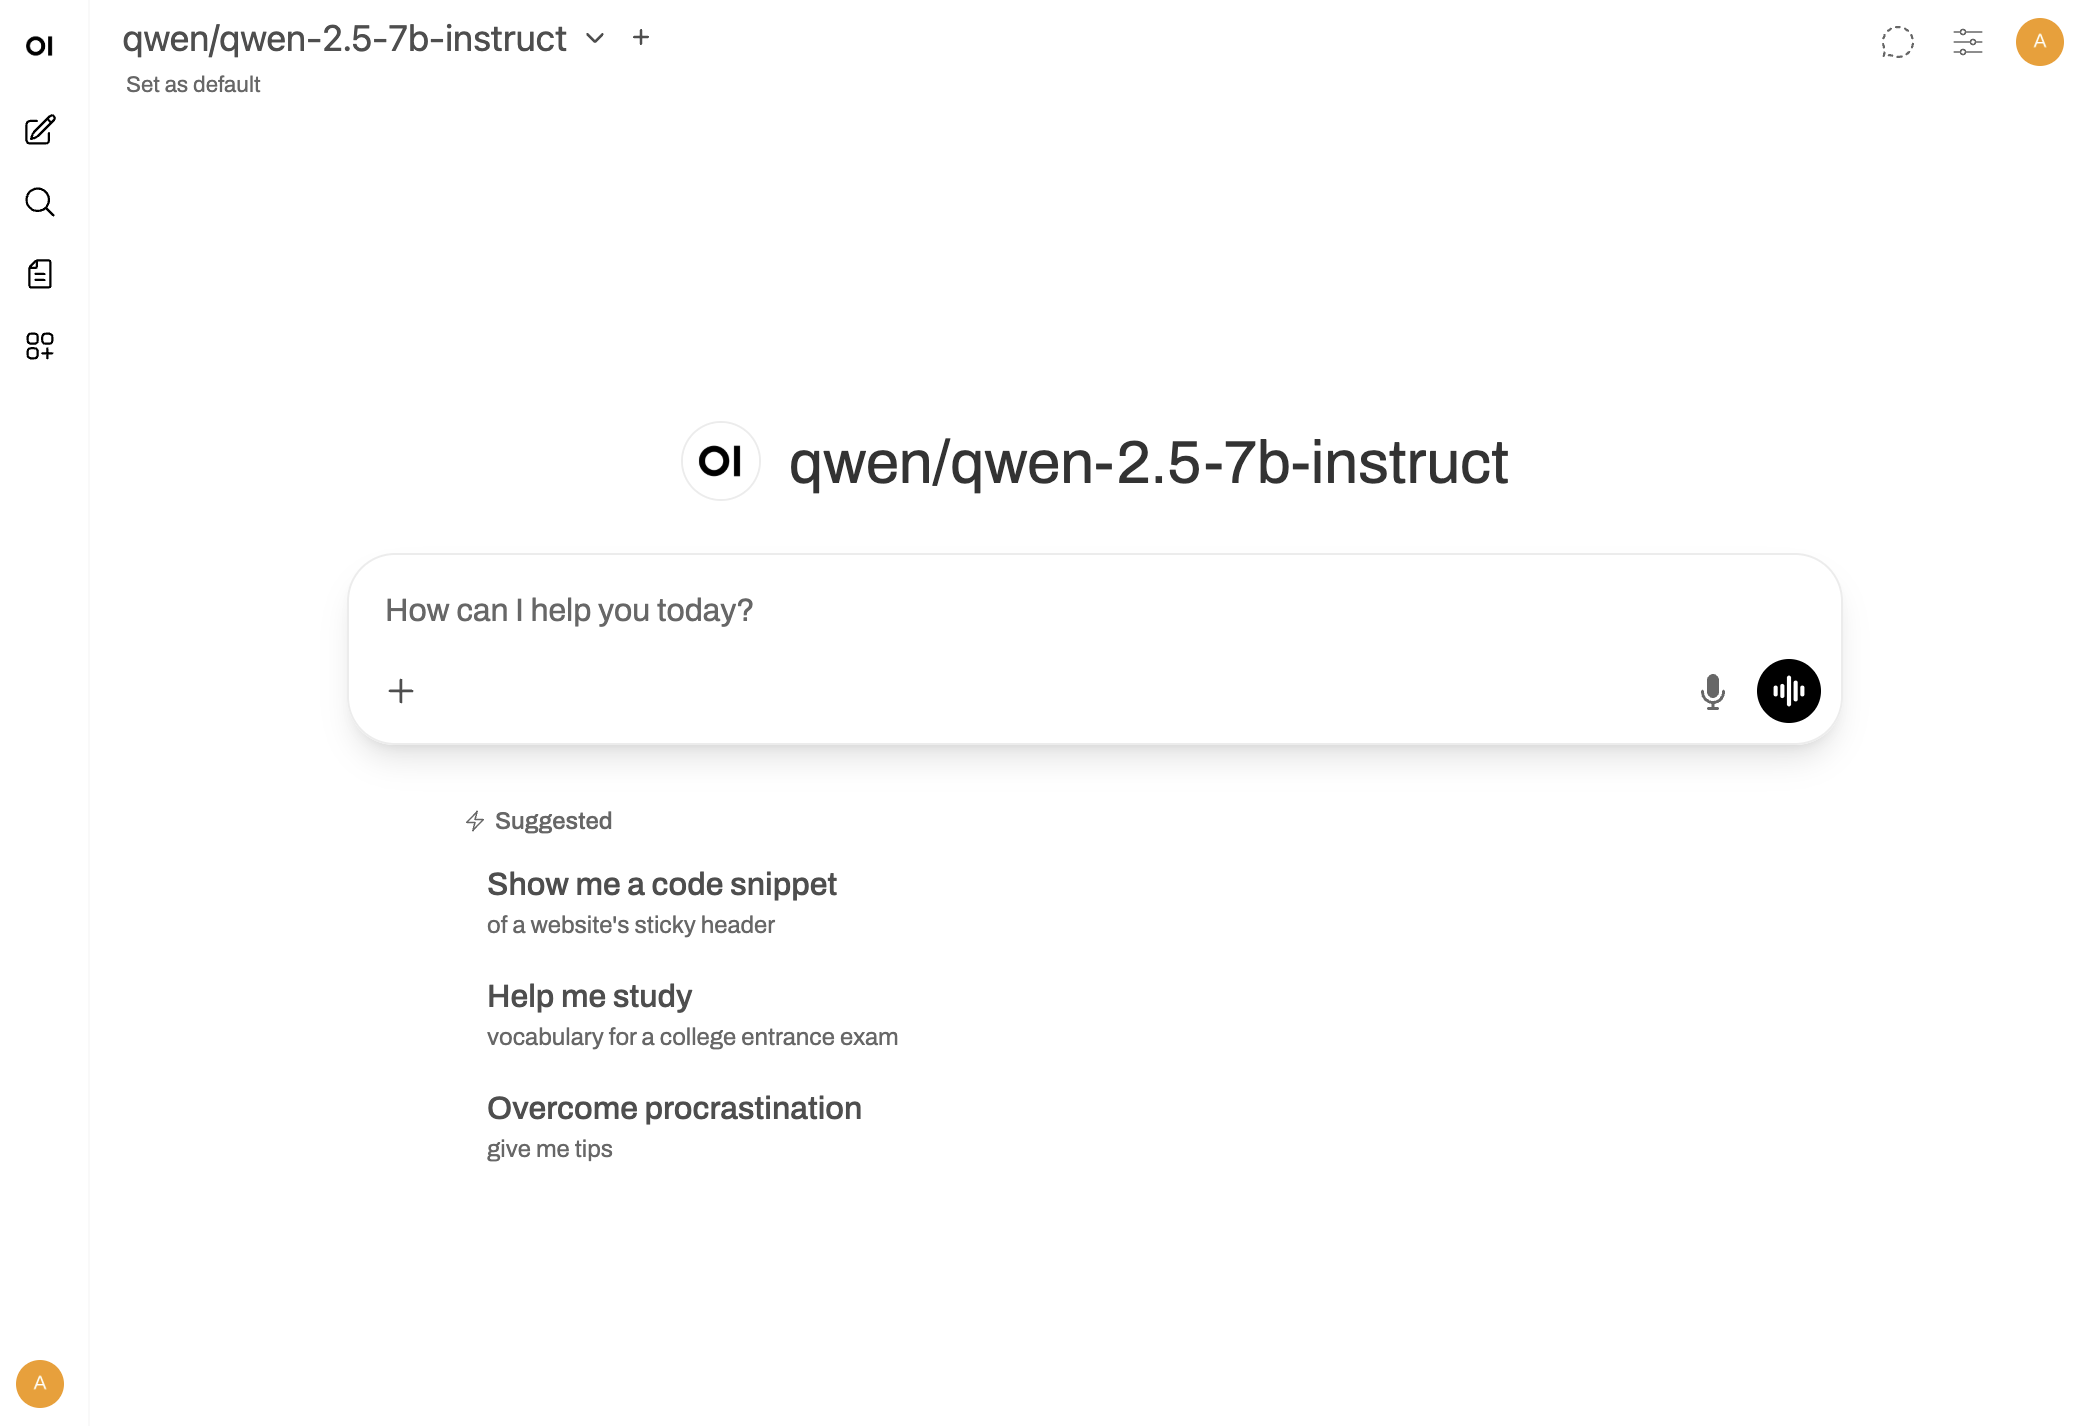
Step 4: Access via API
Beyond the WebUI, you can access your dedicated model programmatically through a REST API. Navigate to the Overview page for your running instance. In the Inference API section, click Quickstart to see example commands and integration code. To make API calls, you’ll need an API key from Open WebUI. Open the WebUI, navigate to Settings → Account → API keys, and create a new key. Use this key as a Bearer token in your requests. Here’s a quick example for chat completions:Managing your instance
Return to the Confidential AI Models page anytime to monitor your model: Overview button: Opens a dashboard with resource metrics, logs, and attestation data. Connect UI button: Always launches the Open WebUI for your model.Billing continues while the instance is running. Stop or schedule destruction when you no longer need the model to avoid ongoing charges.
Troubleshooting
Connect UI button stuck on “Initializing…”
Wait 2-3 minutes after the model reaches Running status. The interface needs time to fully start. Refresh the Confidential AI Models page if the button doesn’t activate.Cannot access Open WebUI
Verify your model status is Running in the Active Workloads section. Check that you’re using the correct URL (should end indstack-prod5.phala.network).
Forgot admin password
We can’t reset your admin password because the model is running in a confidential environment that even the cloud provider doesn’t have access to. You will lose all the chat history if you forget your password.Next steps
You’ve deployed a dedicated model and accessed it through Open WebUI! Now you can:Verify attestation
Confirm your model runs in genuine TEE hardware
GPU TEE
Deploy custom models with full infrastructure control