

Which Verification Guide to Follow?
The verification method depends on what the application deployer chose:| Domain Type | When to Use | Operator |
|---|---|---|
Gateway Domains (*.phala.network) | Your app uses Phala’s gateway domain | Phala Cloud |
| Custom Domain | Your app uses a custom domain with dstack-ingress | Developer |
Gateway Domains
Gateway domains expose attestation endpoints that prove TEE control over TLS certificate private keys.What You’ll Verify
The gateway TEE publishes cryptographic evidence athttps://GATEWAY-DOMAIN/.dstack/ endpoints that proves:
- The TLS certificate private keys are generated and controlled by the gateway TEE
- TEE hardware backs all certificate operations
- Only the TEE-controlled Let’s Encrypt account can issue certificates for gateway domains
- All historical certificates are accounted for via TEE remote attestation
3-Step Verification
Example: We’ll usegateway.dstack-pha-prod7.phala.network - replace with your gateway domain.
Step 1: Get Gateway Evidence
The gateway publishes evidence through three endpoints:Step 2: Verify Certificate Matches TDX Quotes
Check that the served certificate matches the TEE-quoted keys:Step 3: Check Domain Protection and Certificate History
Verify only this TEE can issue certificates:- All certificates are from Let’s Encrypt (no other CAs)
- All the CAA record matches the account_uri from the TEE
- Historical keys in
hist_keyscorrespond to certificates in CT logs
Gateway Evidence Endpoints Reference
| Endpoint | Contains | Proves |
|---|---|---|
/.dstack/index | List of available endpoints | Gateway discovery |
/.dstack/app-info | App ID, instance ID, device ID, TCB info | TEE application identity |
/.dstack/acme-info | ACME account, certificate keys, TDX quotes | Certificate control and history |
acme-info response structure:
| Field | Type | Purpose |
|---|---|---|
account_uri | String | Let’s Encrypt account URI |
account_quote | String | TDX quote proving TEE controls the ACME account |
hist_keys | Array | All certificate public keys (current + historical) |
quoted_hist_keys | Array | Public keys with TDX quotes proving TEE generated them |
active_cert | String | Currently active certificate (PEM format) |
base_domain | String | Base domain for gateway (e.g., dstack-pha-prod7.phala.network) |
Troubleshooting
“Connection refused to /.dstack/ endpoints”: These endpoints are only accessible via the gateway subdomain:gateway.dstack-pha-prod7.phala.network
“Certificate doesn’t match quoted keys”: The gateway may have recently renewed certificates. Re-fetch the evidence with a fresh acme-info request.
“Multiple ACME accounts in history”: Gateway upgrades or migrations may result in new ACME accounts. Check that the CAA record matches the current account_uri, and verify old certificates have expired.
What You’ve Verified
When all checks pass, you’ve cryptographically proven:- Zero-trust TLS: The gateway TEE controls certificate private keys, verifiable via TDX attestation
- Phala-operated infrastructure: Phala Network operates the gateway TEE and maintains CAA records
- Certificate transparency: All certificates are publicly auditable via CT logs
Custom Domains
Custom domains use dstack-ingress running in your application’s TEE to manage certificates. The application deployer operates the certificate infrastructure.What You’ll Verify
Your TEE publishes cryptographic evidence athttps://your-domain.com/evidences/ that proves:
- The TLS certificate is controlled exclusively by this TEE
- Intel TDX hardware backs the attestation
- No one else can issue certificates for this domain
Prerequisites
Before starting, you’ll need:- Your domain name (e.g.,
your-domain.com) curl,jq,openssl, anddigcommands installed- 3 minutes to complete all verifications
Simple 3-Step Verification
Example: We’ll usecustom-domain-demo.phala.systems - just replace with your domain.
Step 1: Get the Evidence Files
Your TEE publishes 4 files that prove it controls the certificate:Step 2: Verify the Certificate Matches
Check that the evidence matches what’s actually being served:Step 3: Check Domain Protection and Timeline
Make sure only this TEE can get certificates for your domain:- Already expired (check the “to” date)
- Issued by the same ACME account (meaning they were from a previous TEE deployment)
Understanding the Results
When all verifications pass, you’ve proven: ✅ Exclusive TEE Control: Only this specific TEE instance has the private key for your TLS certificate ✅ Hardware-Backed Security: Intel TDX hardware cryptographically signed the evidence, proving it’s a genuine TEE ✅ Domain Protection: CAA DNS records prevent anyone else (even with domain access) from issuing certificates ✅ Complete Chain of Trust: Every link from TDX hardware → evidence files → certificate → your connection is verifiedEvidence Files Reference
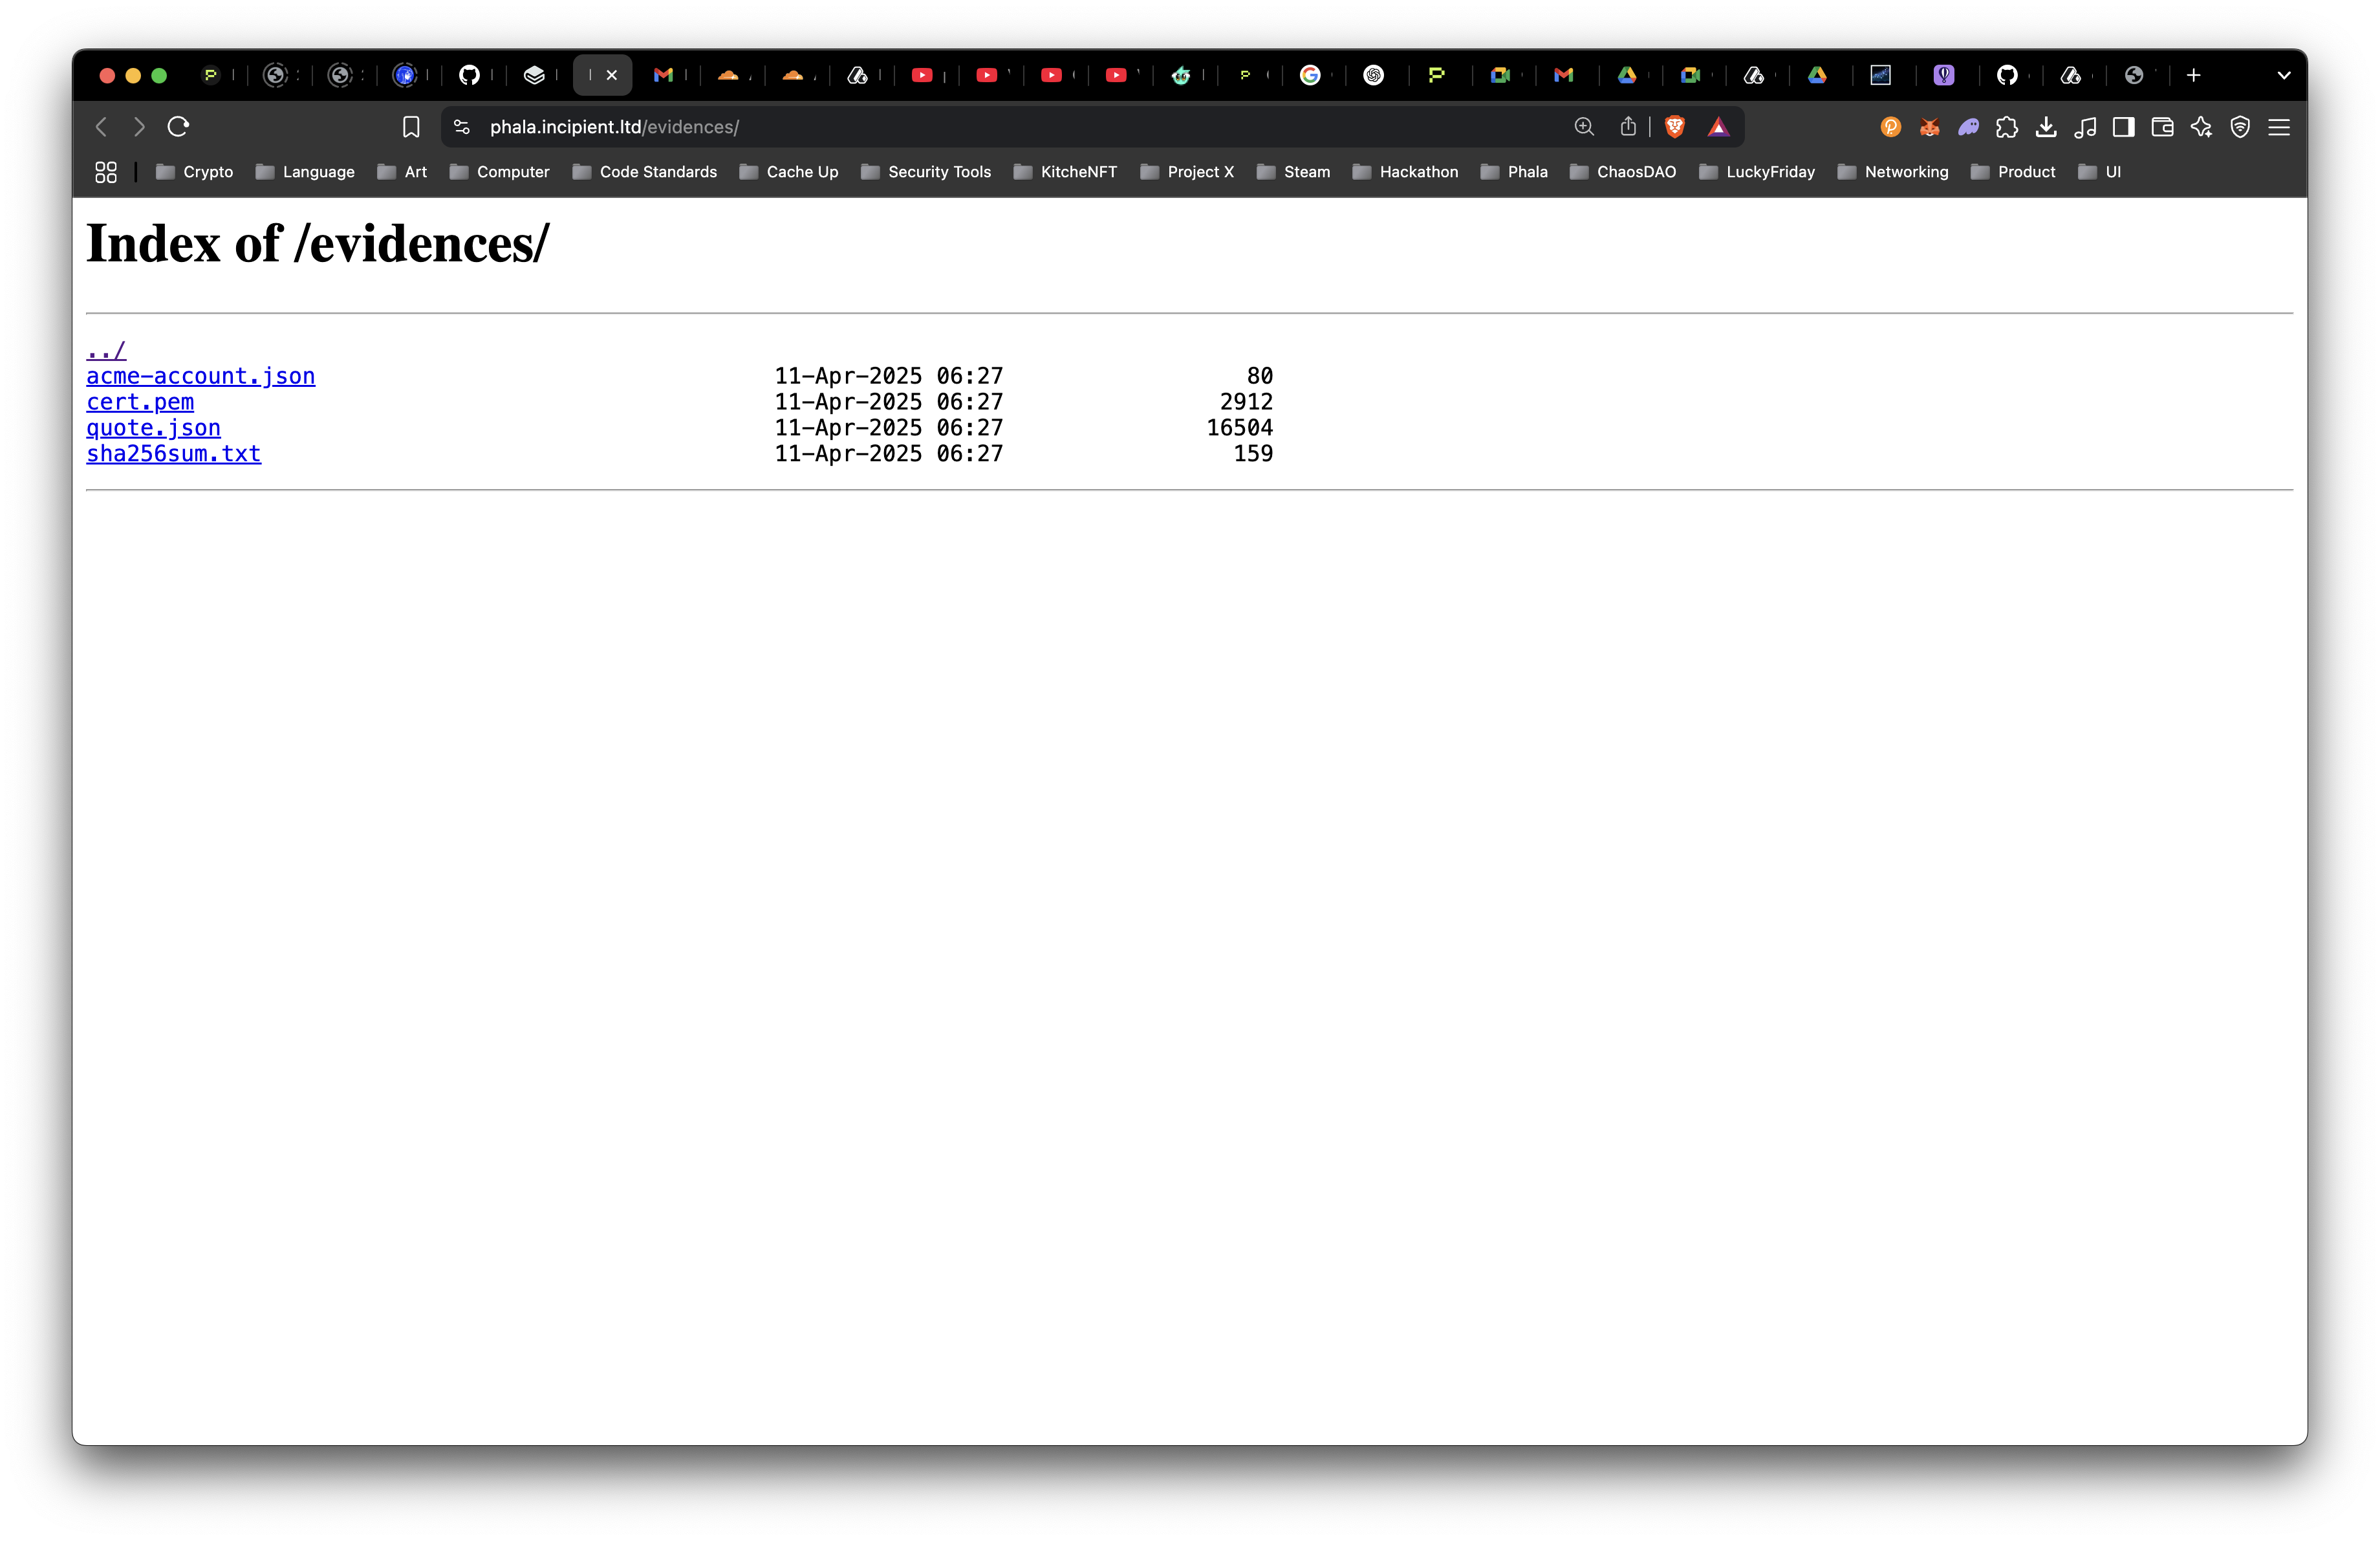
/evidences/ work together:
| File | Contains | Proves |
|---|---|---|
quote.json | TDX attestation with embedded hash | Hardware generated the evidence |
sha256sum.txt | SHA256 of cert.pem + acme-account.json | Links certificate to ACME account |
cert.pem | Current TLS certificate | What’s being served to clients |
acme-account.json | ACME account URI | Which account controls certificates |
Troubleshooting
“Files not found at /evidences/”: Ensure your domain uses custom domain setup withSET_CAA=true
“Certificate doesn’t match”: The TEE may have renewed the certificate. Re-download evidence files.
“Hash not in quote”: Verify you’re checking a production TEE deployment, not a test instance.
“CAA record missing”: The domain owner needs to set CAA records pointing to the TEE’s ACME account.
Going Deeper: Application Trust
While you’ve verified the network connection is secure, the TLS private key is only as trustworthy as the code handling it. The key management software (dstack-ingress) runs inside the TEE and is open-source auditable code. To verify the exact code handling your keys matches what’s deployed, check the compose-hash in the TEE’s event log against the published source code. This ensures no malicious code can access or leak your private keys. Learn more: Application Attestation DocumentationComplete Security Checklist
Network Security (covered above):
- ✅ Evidence files verify TEE control
- ✅ TDX attestation proves hardware backing
- ✅ CAA records prevent unauthorized certificates
- ✅ Certificate timeline shows no pre-deployment threats
- ⚠️ Application code trust - Verify compose-hash matches source code
- ⚠️ Certificate timeline - Ensure no valid pre-CAA certificates exist
- ⚠️ Continuous monitoring - Watch CT logs for unexpected certificates
Next Steps
Monitoring
Set up alerts on crt.sh to detect unexpected certificate issuance:- Gateway domains:
%.dstack-pha-prod7.phala.network - Custom domains:
your-domain.com
Development
- Gateway verification: Integrate attestation checks into your security monitoring workflow
- Custom domains: Enable CAA records with
SET_CAA=truein your deployment configuration