

Make sure you have created your Phala Cloud account before continuing.
Prerequisites
- A Phala Cloud account
- Basic familiarity with Docker Compose
Step 1 — Open the Deploy Page
Navigate to your workspace and click the Deploy button in the top-right corner of the CVMs page.Step 2 — Configure Your CVM
On the Deploy page, fill in the following:-
Name: Enter a name for your CVM (e.g.,
my-first-cvm). -
docker-compose.yml: Replace the default content with the Jupyter Notebook configuration below:
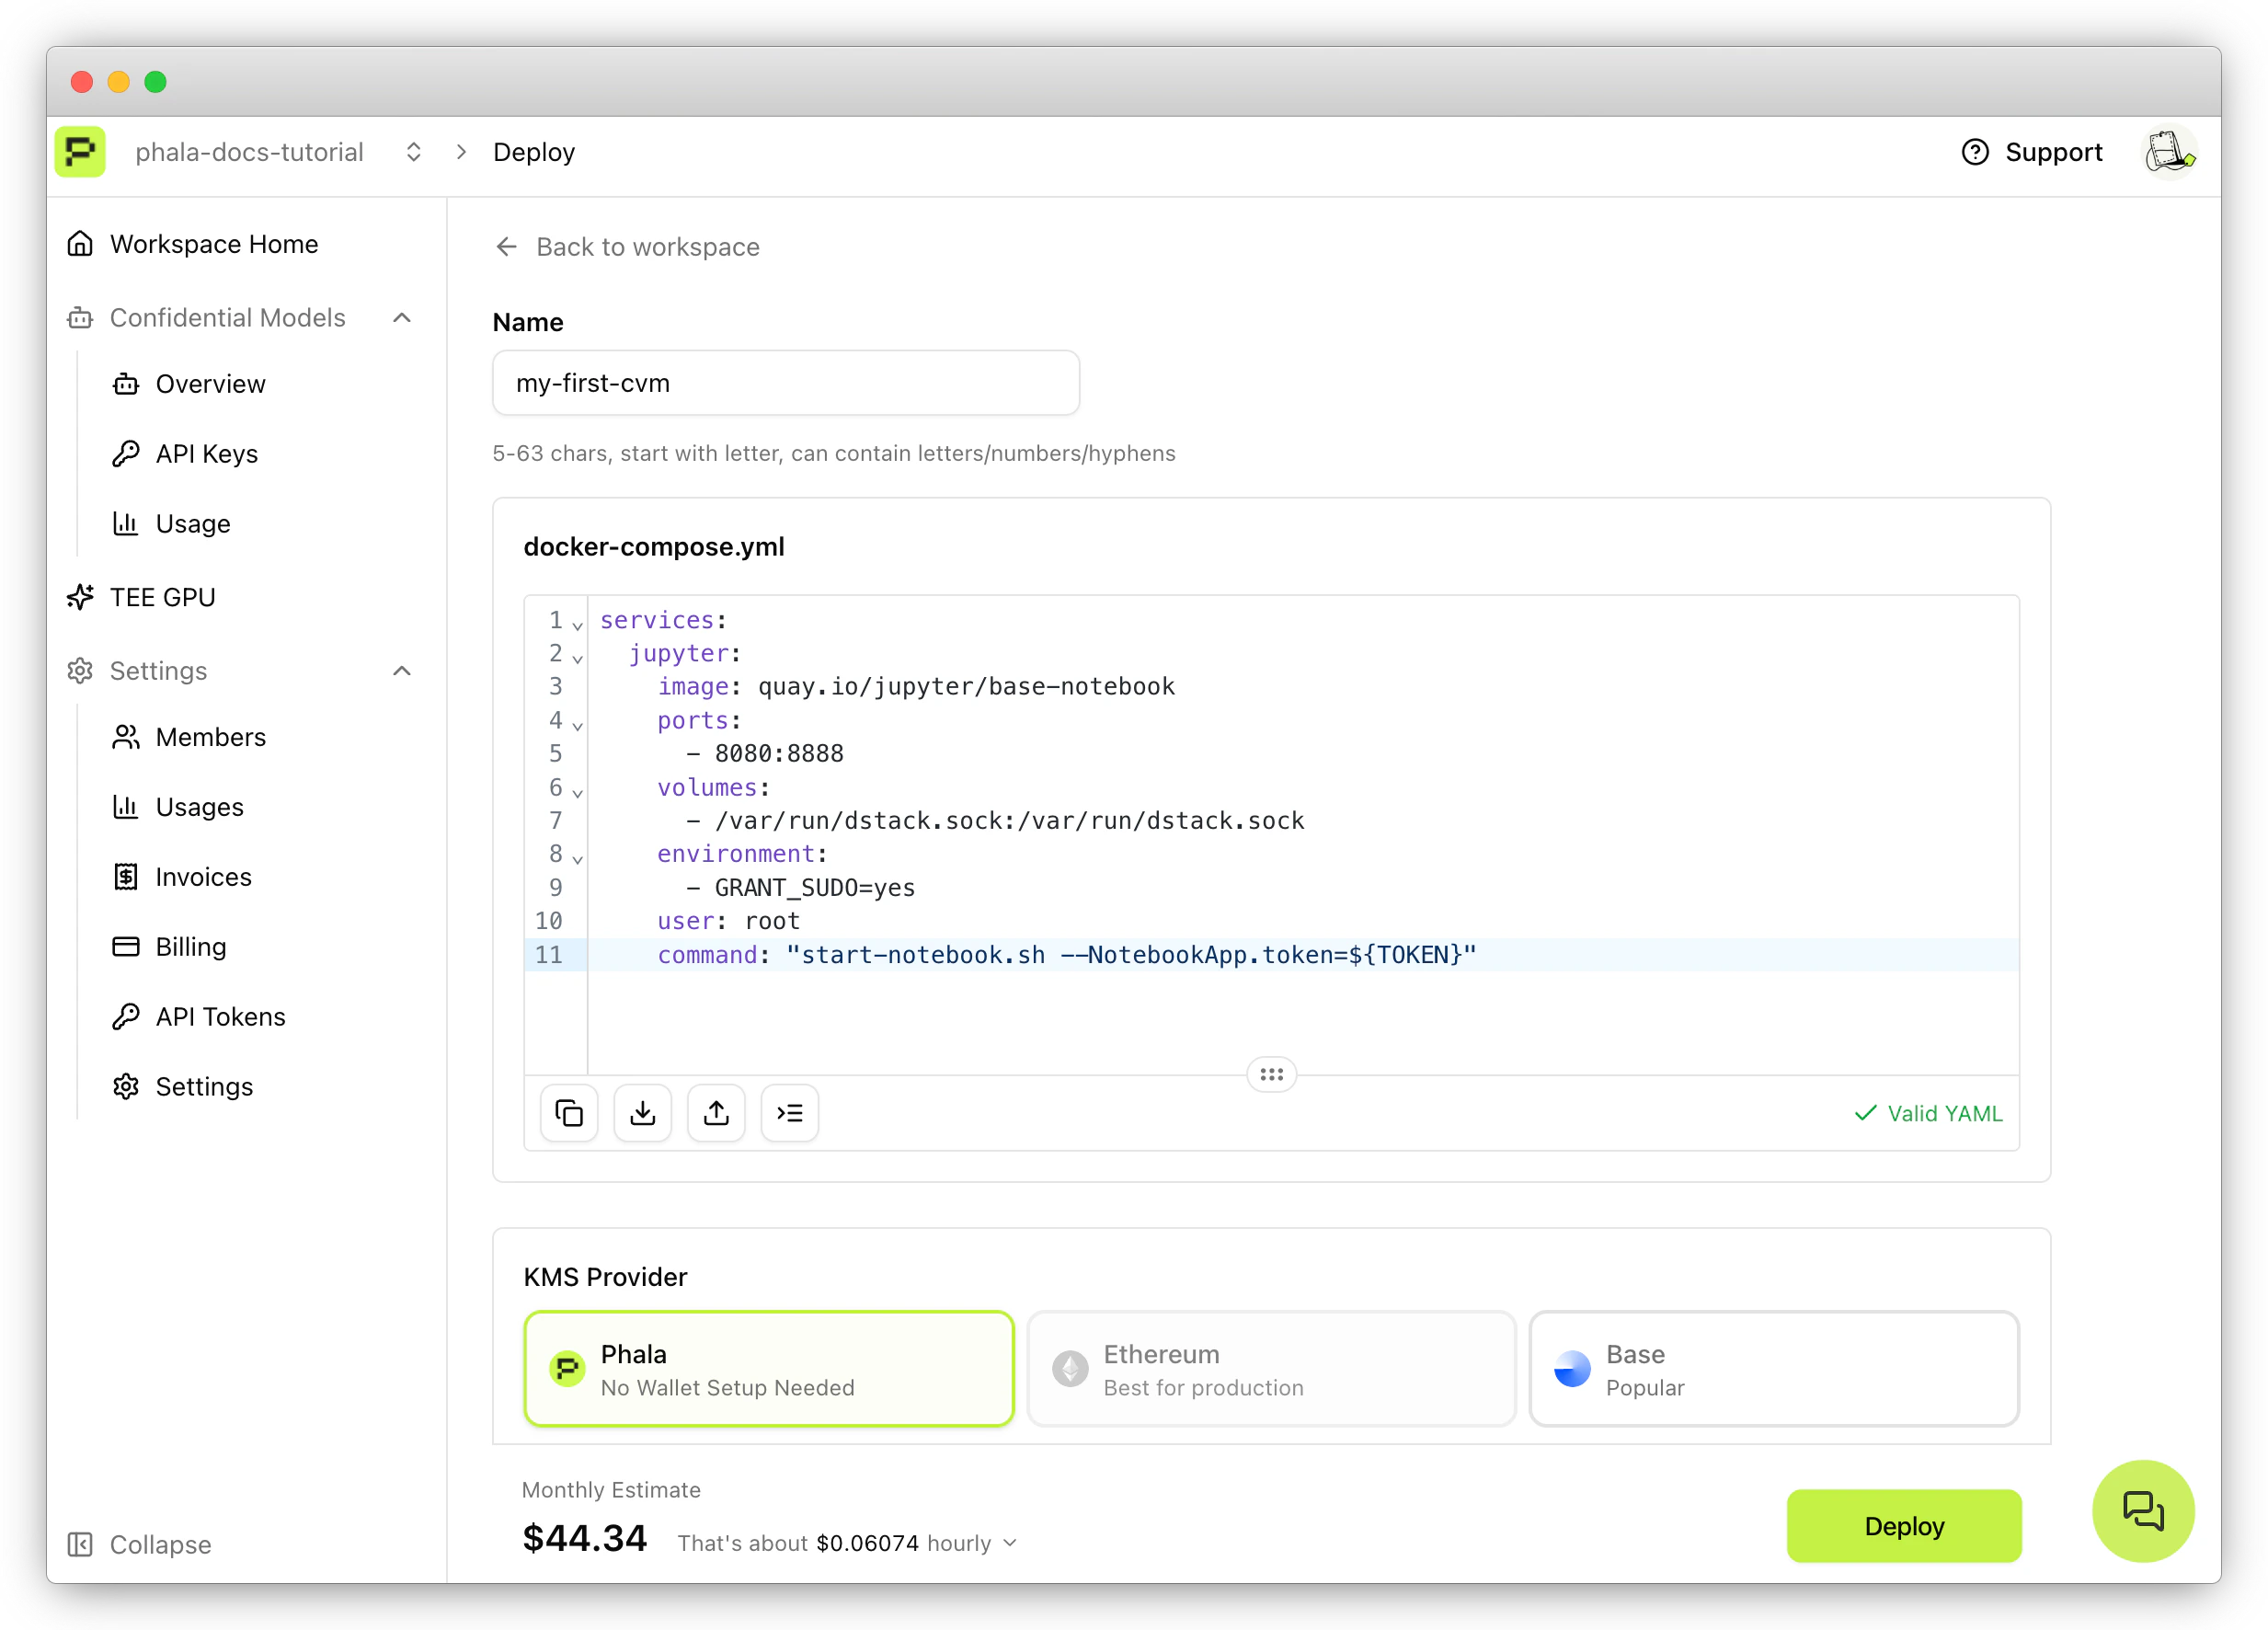
- KMS Provider: Select Phala (no wallet setup needed for testing).
- Region: Choose a region closest to you (e.g., US West).
- Instance Type: Keep the default CPU TEE with Small TDX Instance (1 vCPU, 2GB RAM).
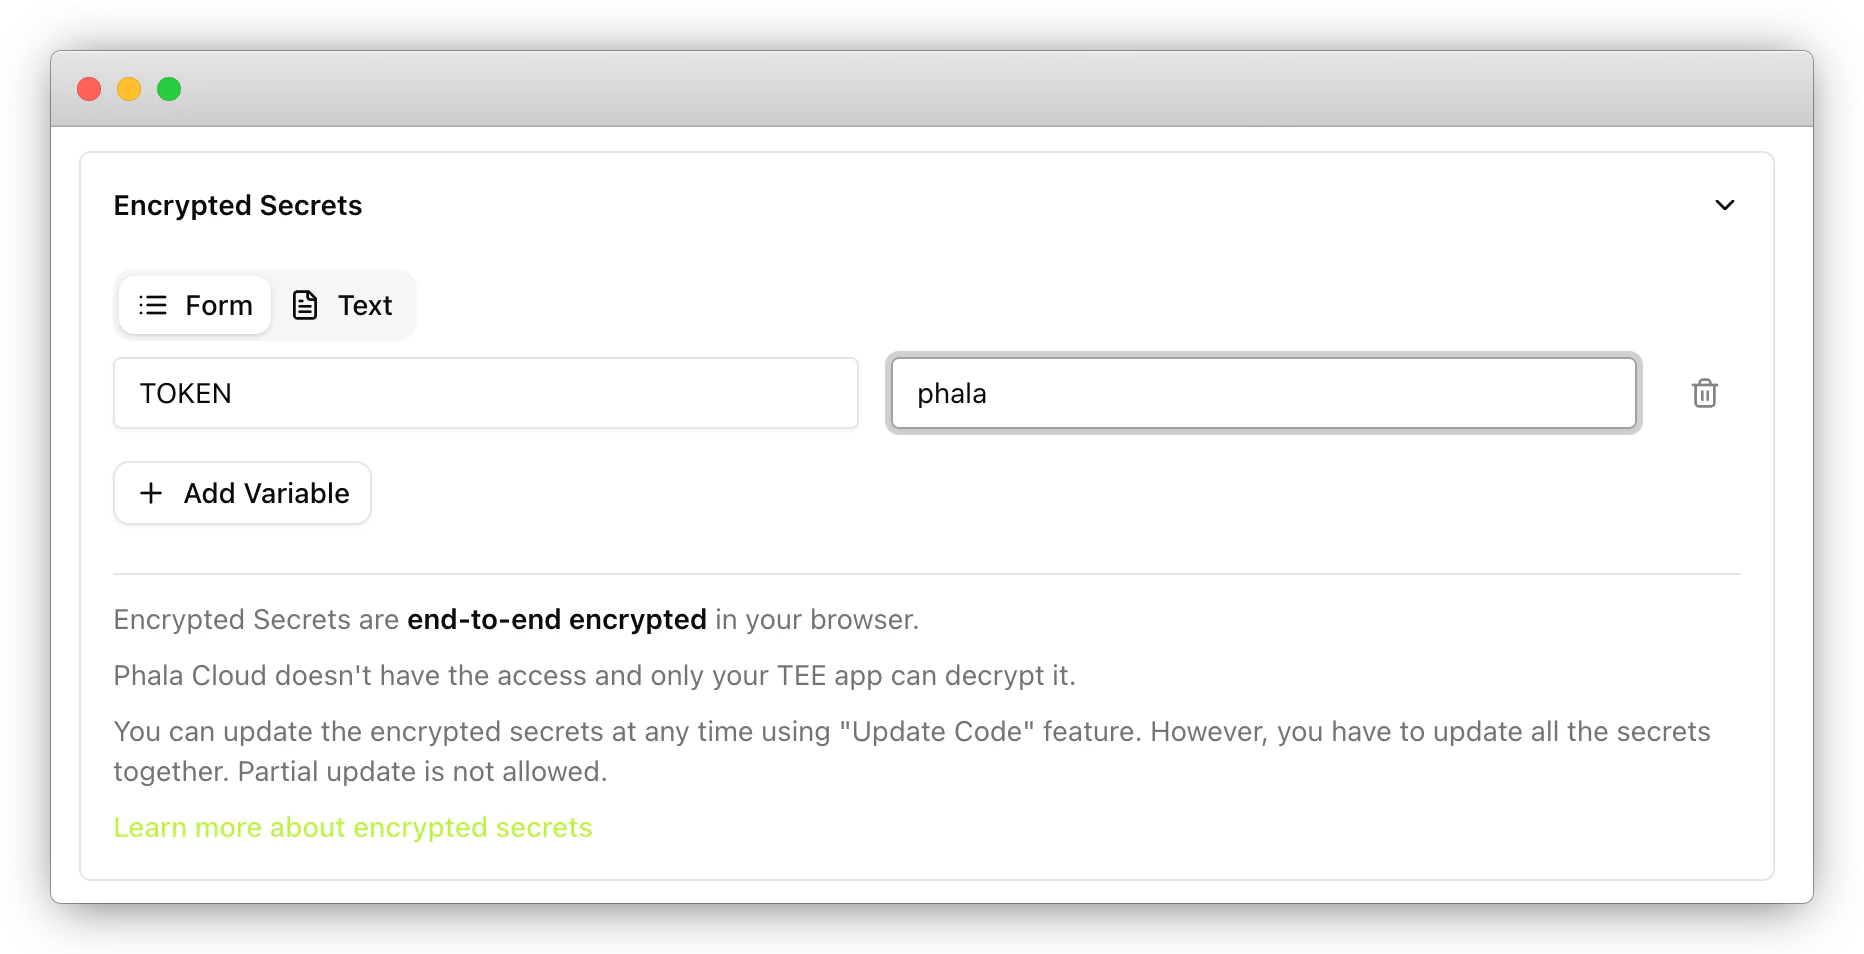
Step 3 — Set Encrypted Secrets
Scroll down and expand the Encrypted Secrets section. Add the following key-value pair:| Key | Value |
|---|---|
TOKEN | phala |
TOKEN variable is referenced in the command field of the compose file as ${TOKEN}. Encrypted Secrets are end-to-end encrypted between you and your CVM.
Step 4 — Deploy
Click the Deploy button. You’ll be redirected to the CVMs page where your CVM will show a starting status. This typically takes 1–2 minutes. Once ready, the status changes to running.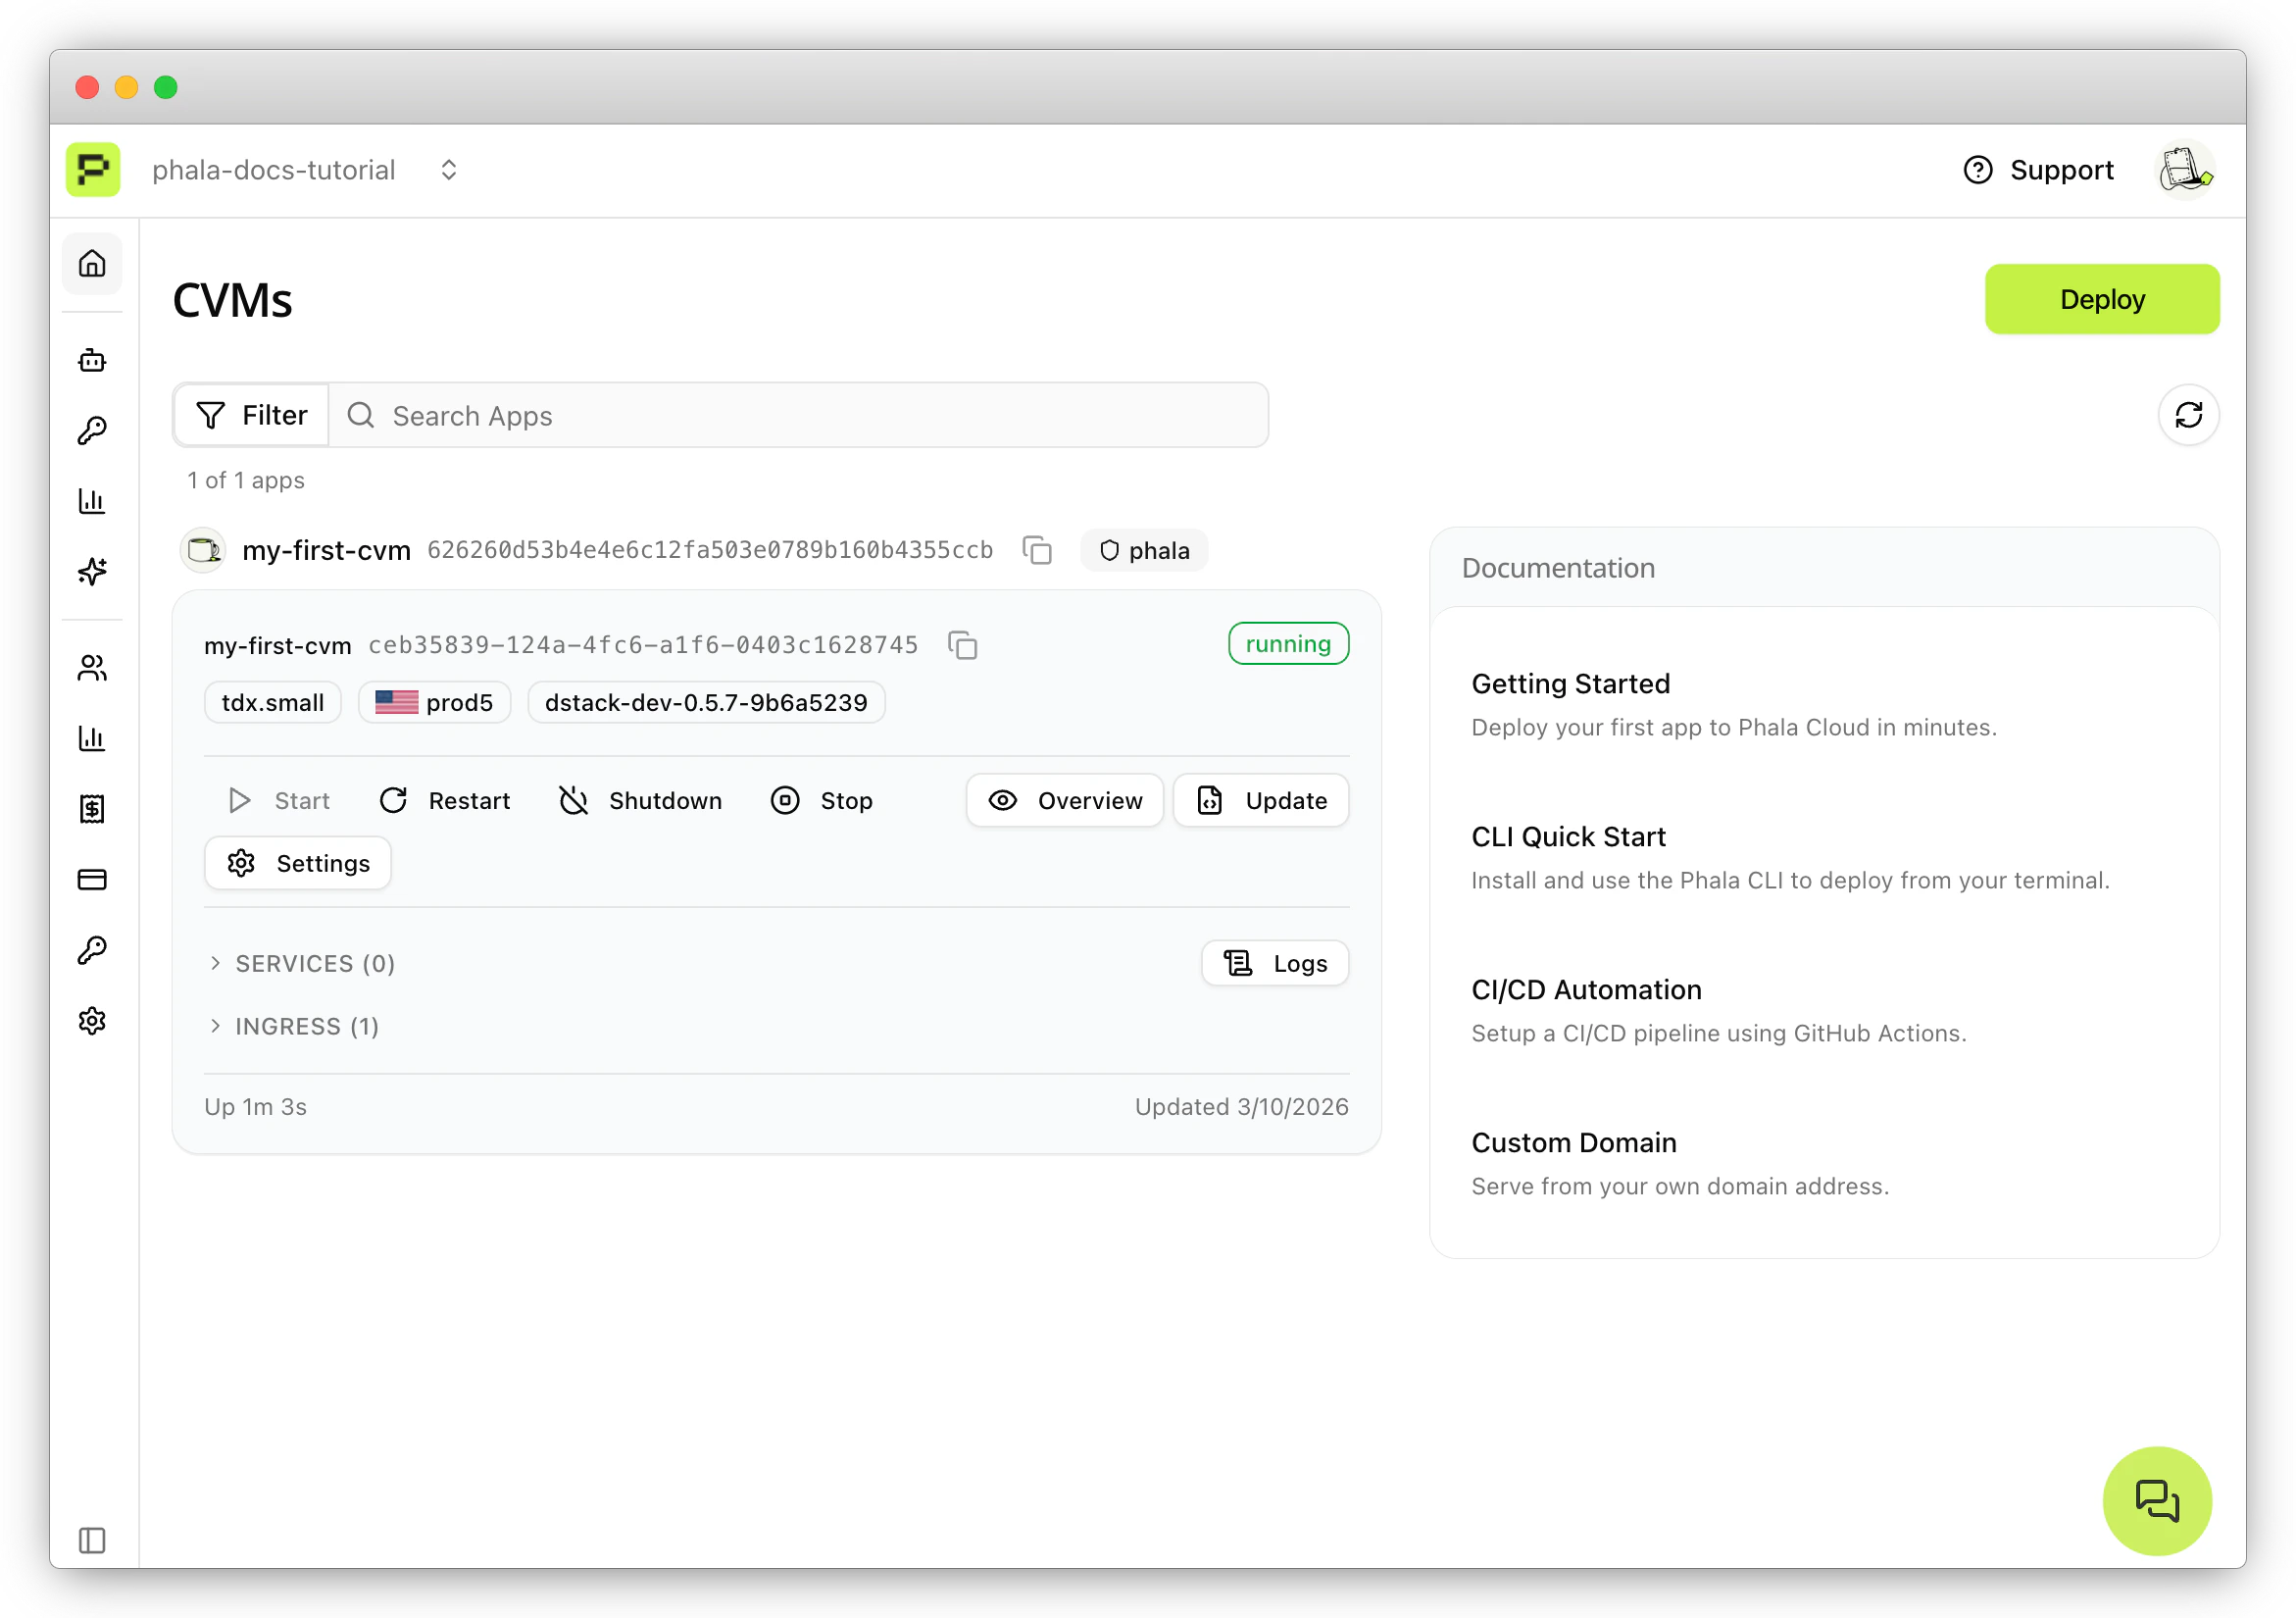
Step 5 — Access Your Application
Click Overview on the CVM card, then click Home in the sidebar. Expand the INGRESS section to find your application’s public endpoint URL.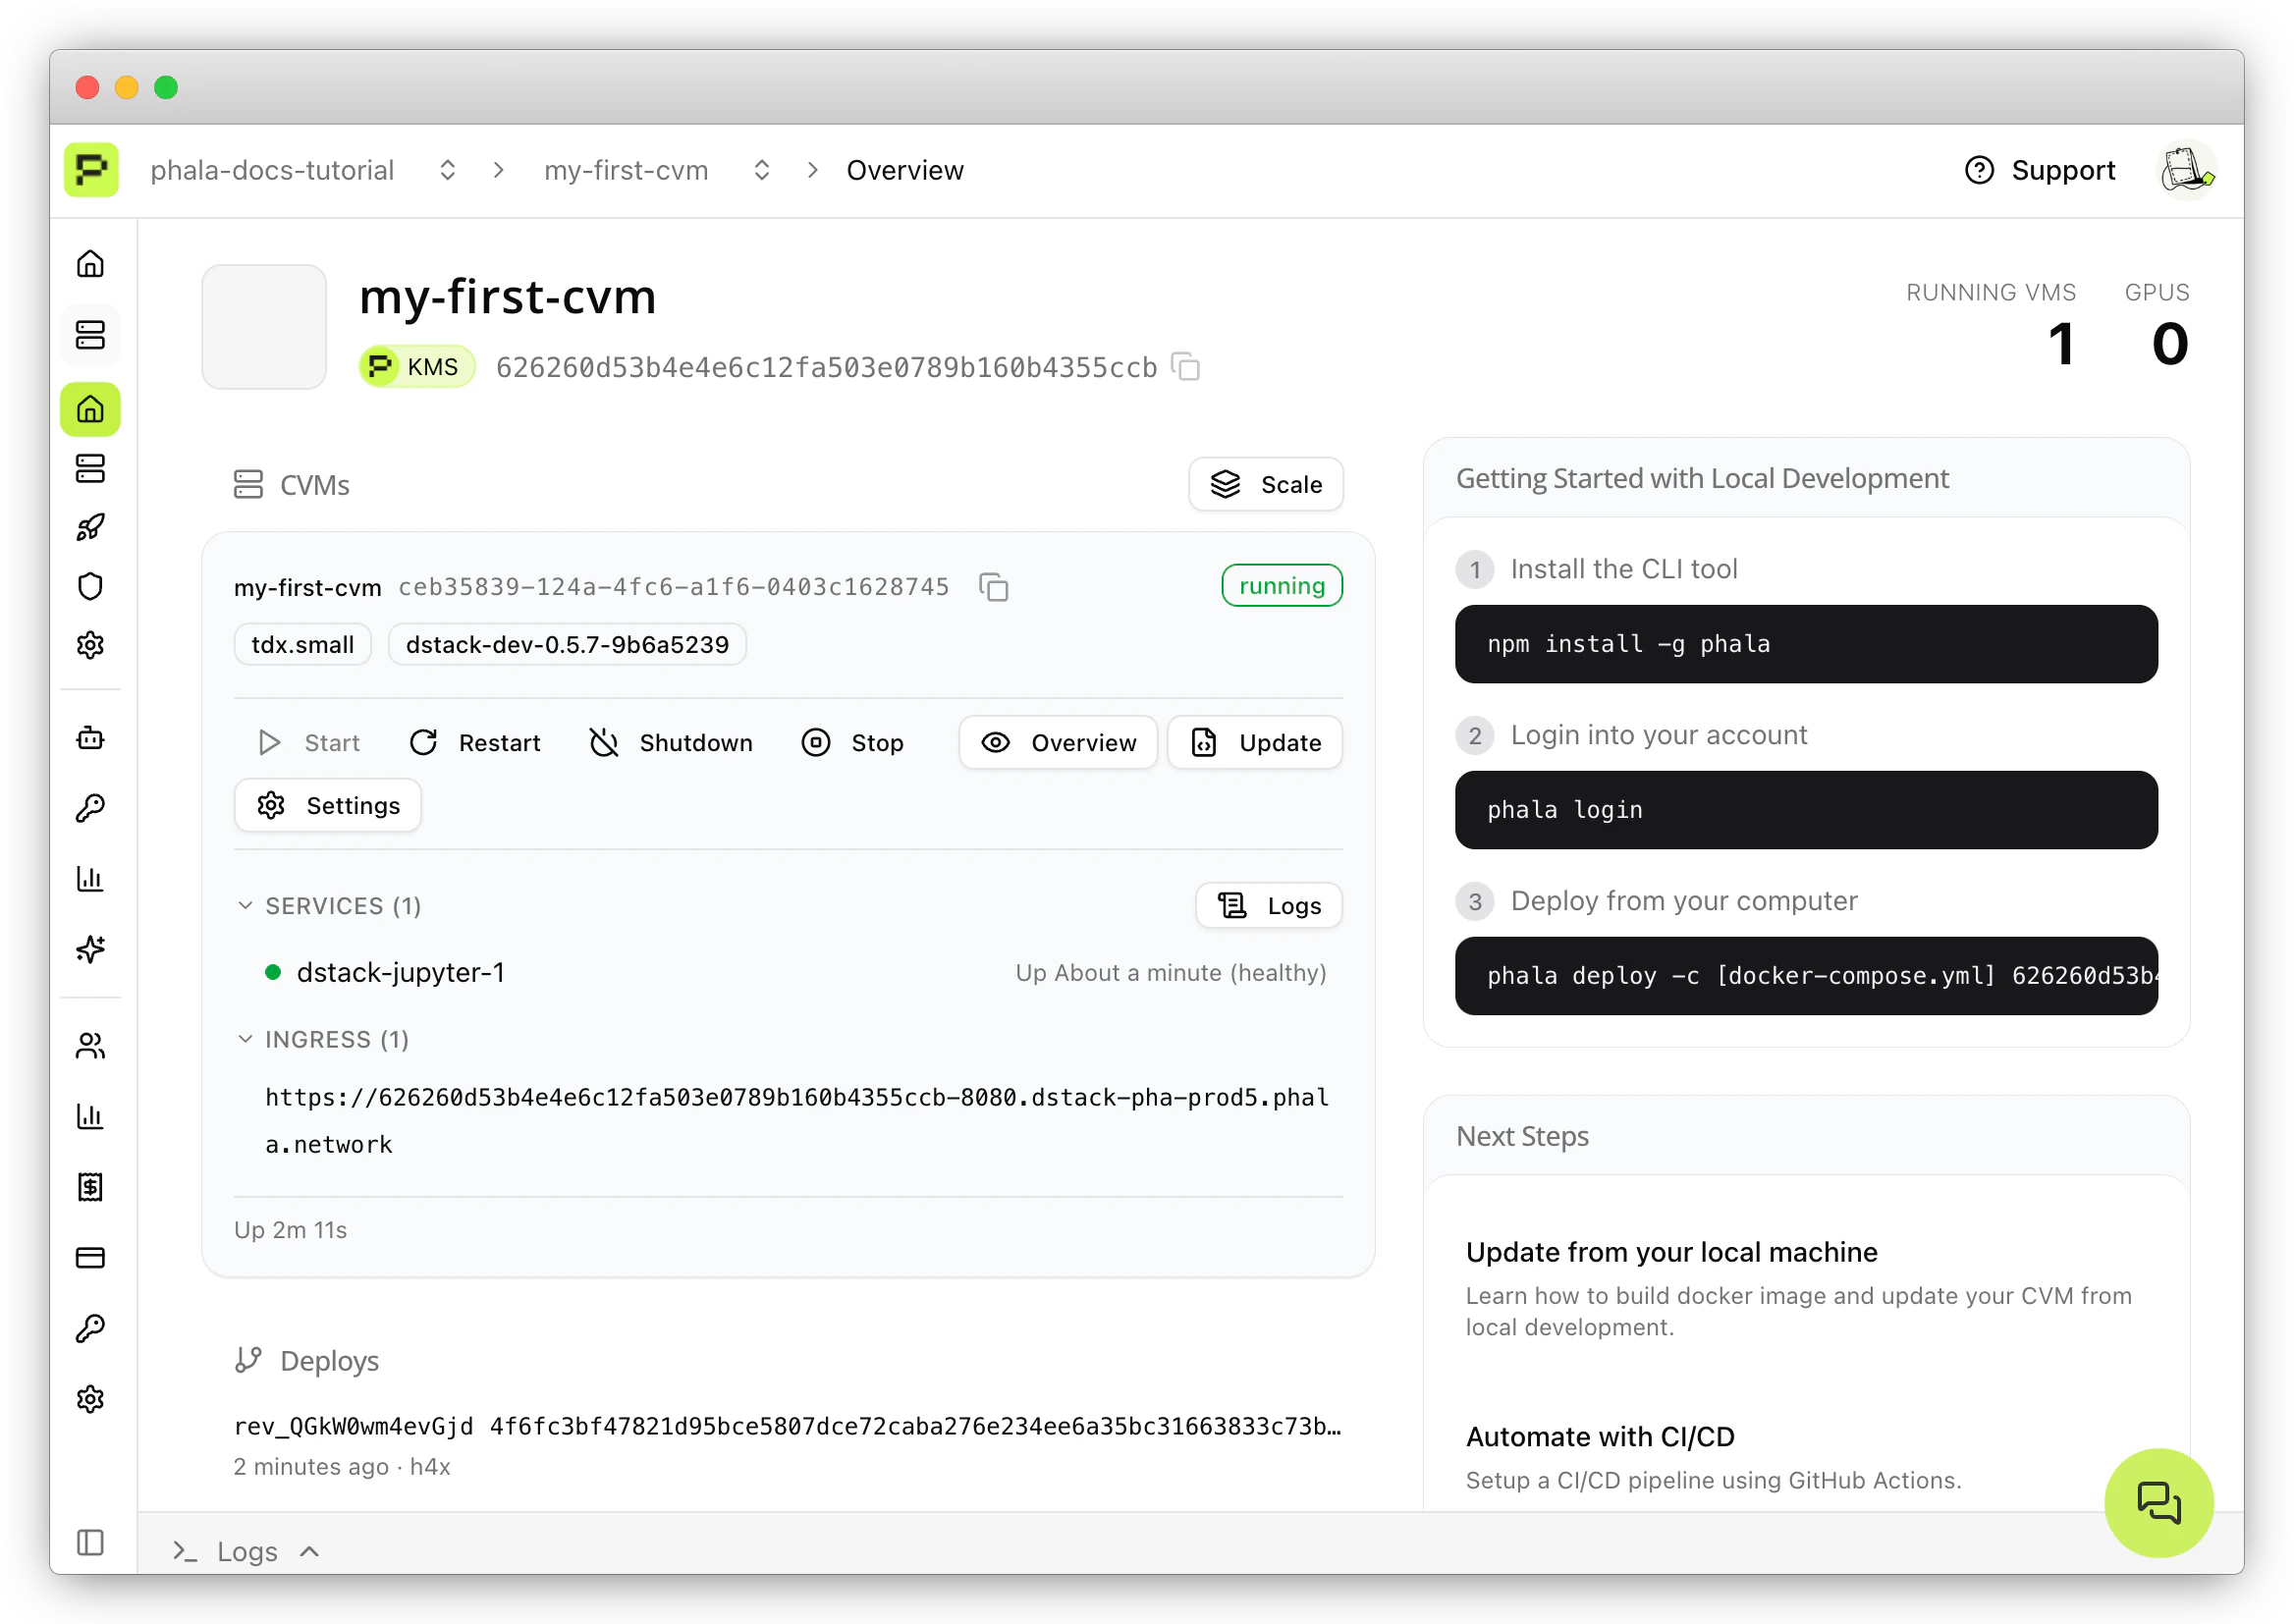
- App ID: Your CVM’s unique identifier
- Port: The external port mapped in your compose file (
8080in this example) - Node: The infrastructure node running your CVM
phala (the value you set in Encrypted Secrets) to access the notebook.
Step 6 — Verify TEE Proof
Navigate to Attestations in the sidebar to view the Remote Attestation report for your CVM. This report proves your application is running inside a genuine TEE. Click Check Attestation to open the TEE Attestation Explorer, where you can verify the attestation quote. You can share this proof with anyone to demonstrate that your application runs in a secure, confidential environment. For more details on attestation, see Get Attestation and Verify.Attestation reports may take a few minutes to become available after deployment.
Next Steps
Now that you’ve deployed your first CVM, explore further:- Create CVMs with Docker Compose — advanced configuration options
- Deploy from CLI — deploy and manage CVMs from your terminal
- Explore Templates — pre-built setups for common frameworks
- Security Architecture — understand how Phala Cloud protects your data