> ## Documentation Index
> Fetch the complete documentation index at: https://docs.phala.com/llms.txt
> Use this file to discover all available pages before exploring further.
> Deploy dedicated GPU resources for AI models with hourly pricing. Same models as the API but with dedicated performance.
# Dedicated Models
Dedicated Models let you host large language models on dedicated GPU hardware inside trusted execution environments (TEEs). You get the same pre-deployed models as the [Confidential AI API](/phala-cloud/confidential-ai/confidential-model/confidential-ai-api), but with dedicated resources and hourly pricing instead of per-request billing.
Choose this option when you need predictable performance or cost efficiency for high-volume inference workloads. For custom workloads beyond pre-deployed models, see [GPU TEE](/phala-cloud/confidential-ai/confidential-gpu/deploy-and-verify).
This option uses the same OpenAI-compatible API as API Access, including all advanced features like tool calling and vision. The only difference is dedicated GPU resources with hourly billing instead of shared infrastructure.
## Prerequisites
* Phala Cloud account with sufficient credits
* Basic familiarity with LLM deployment
## Step 1: Deploy your model
### Access the deployment page
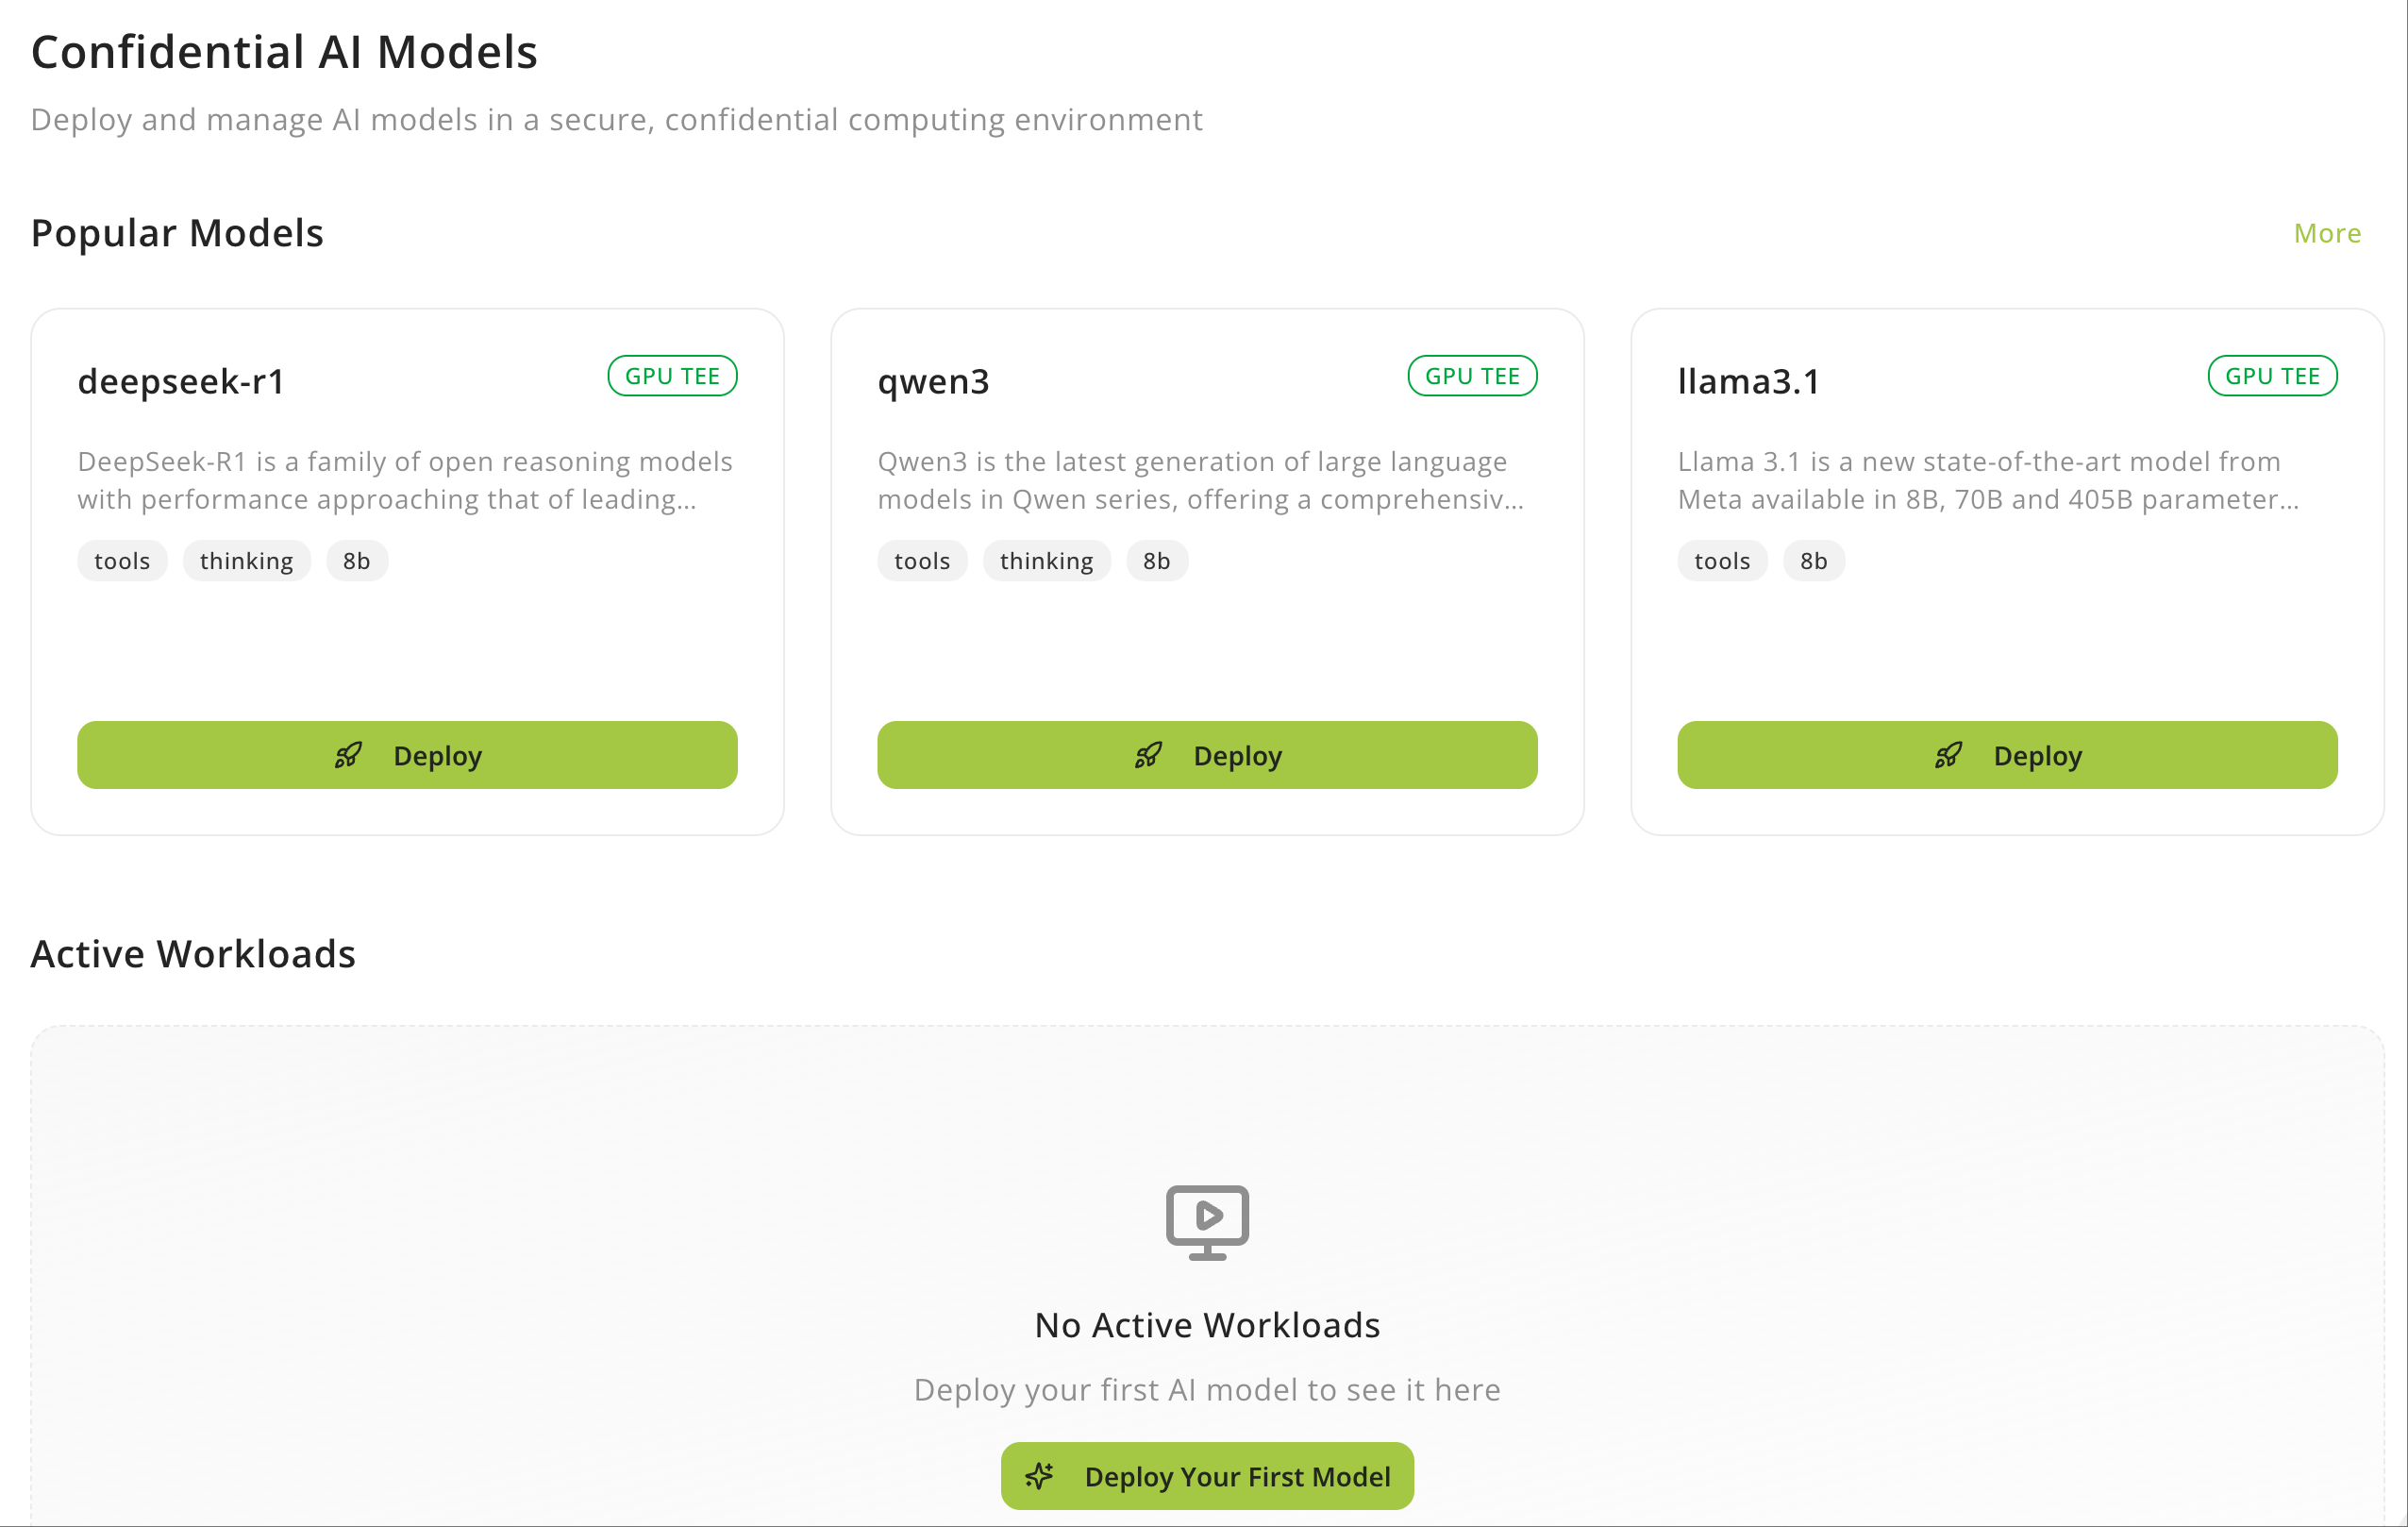
Sign in to your Phala Cloud account and select **Confidential AI Models** from the top navigation bar.
 ### Choose a model
Locate the model you want to deploy (e.g., `qwen-2.5-7b-instruct`) and click **Deploy** to open the deployment wizard. Review the model description to understand its capabilities. For example, Qwen 2.5 models are instruction-tuned language models optimized for chat and task completion.
Don't see your preferred model? We can add custom models—reach out through [Support](/phala-cloud/support).
### Configure deployment
Fill out the deployment form with these details:
**Service Name**: Give your deployment a memorable name (e.g., `qwen-2-5-7b-instruct`). Use the auto-generated name or create your own.
**Node & Image**: Select your preferred deployment location and image version. Available options depend on current capacity (e.g., `gpu1 us-west-1` with `dstack-nvidia-0.5.0`).
**Resource Plan**: Review the hardware allocation for your chosen model. For example, `qwen-2.5-7b-instruct` typically includes:
* H200 GPU with 141 GB VRAM
* 24 vCPUs
* 256 GB RAM
* 40 GB disk
* \$3.20 per hour pricing
**Scheduled Destroy**: Set an auto-destruction date to avoid ongoing charges, or leave empty for manual control.
### Launch the deployment
Review your configuration and click **Deploy** to launch. Provisioning takes a few minutes.
### Choose a model
Locate the model you want to deploy (e.g., `qwen-2.5-7b-instruct`) and click **Deploy** to open the deployment wizard. Review the model description to understand its capabilities. For example, Qwen 2.5 models are instruction-tuned language models optimized for chat and task completion.
Don't see your preferred model? We can add custom models—reach out through [Support](/phala-cloud/support).
### Configure deployment
Fill out the deployment form with these details:
**Service Name**: Give your deployment a memorable name (e.g., `qwen-2-5-7b-instruct`). Use the auto-generated name or create your own.
**Node & Image**: Select your preferred deployment location and image version. Available options depend on current capacity (e.g., `gpu1 us-west-1` with `dstack-nvidia-0.5.0`).
**Resource Plan**: Review the hardware allocation for your chosen model. For example, `qwen-2.5-7b-instruct` typically includes:
* H200 GPU with 141 GB VRAM
* 24 vCPUs
* 256 GB RAM
* 40 GB disk
* \$3.20 per hour pricing
**Scheduled Destroy**: Set an auto-destruction date to avoid ongoing charges, or leave empty for manual control.
### Launch the deployment
Review your configuration and click **Deploy** to launch. Provisioning takes a few minutes.
 Monitor the status in the Active Workloads section on the Confidential AI Models page. Your model will progress through these states:
* **Preparing**: Allocating resources
* **Starting**: Launching the model
* **Running**: Ready to use
Billing starts when the model enters Running status. Remember to stop or schedule destruction when you no longer need the instance.
## Step 2: Access Open WebUI
Once your model reaches Running status, you can access it through Open WebUI, a browser-based chat interface.
### Open the interface
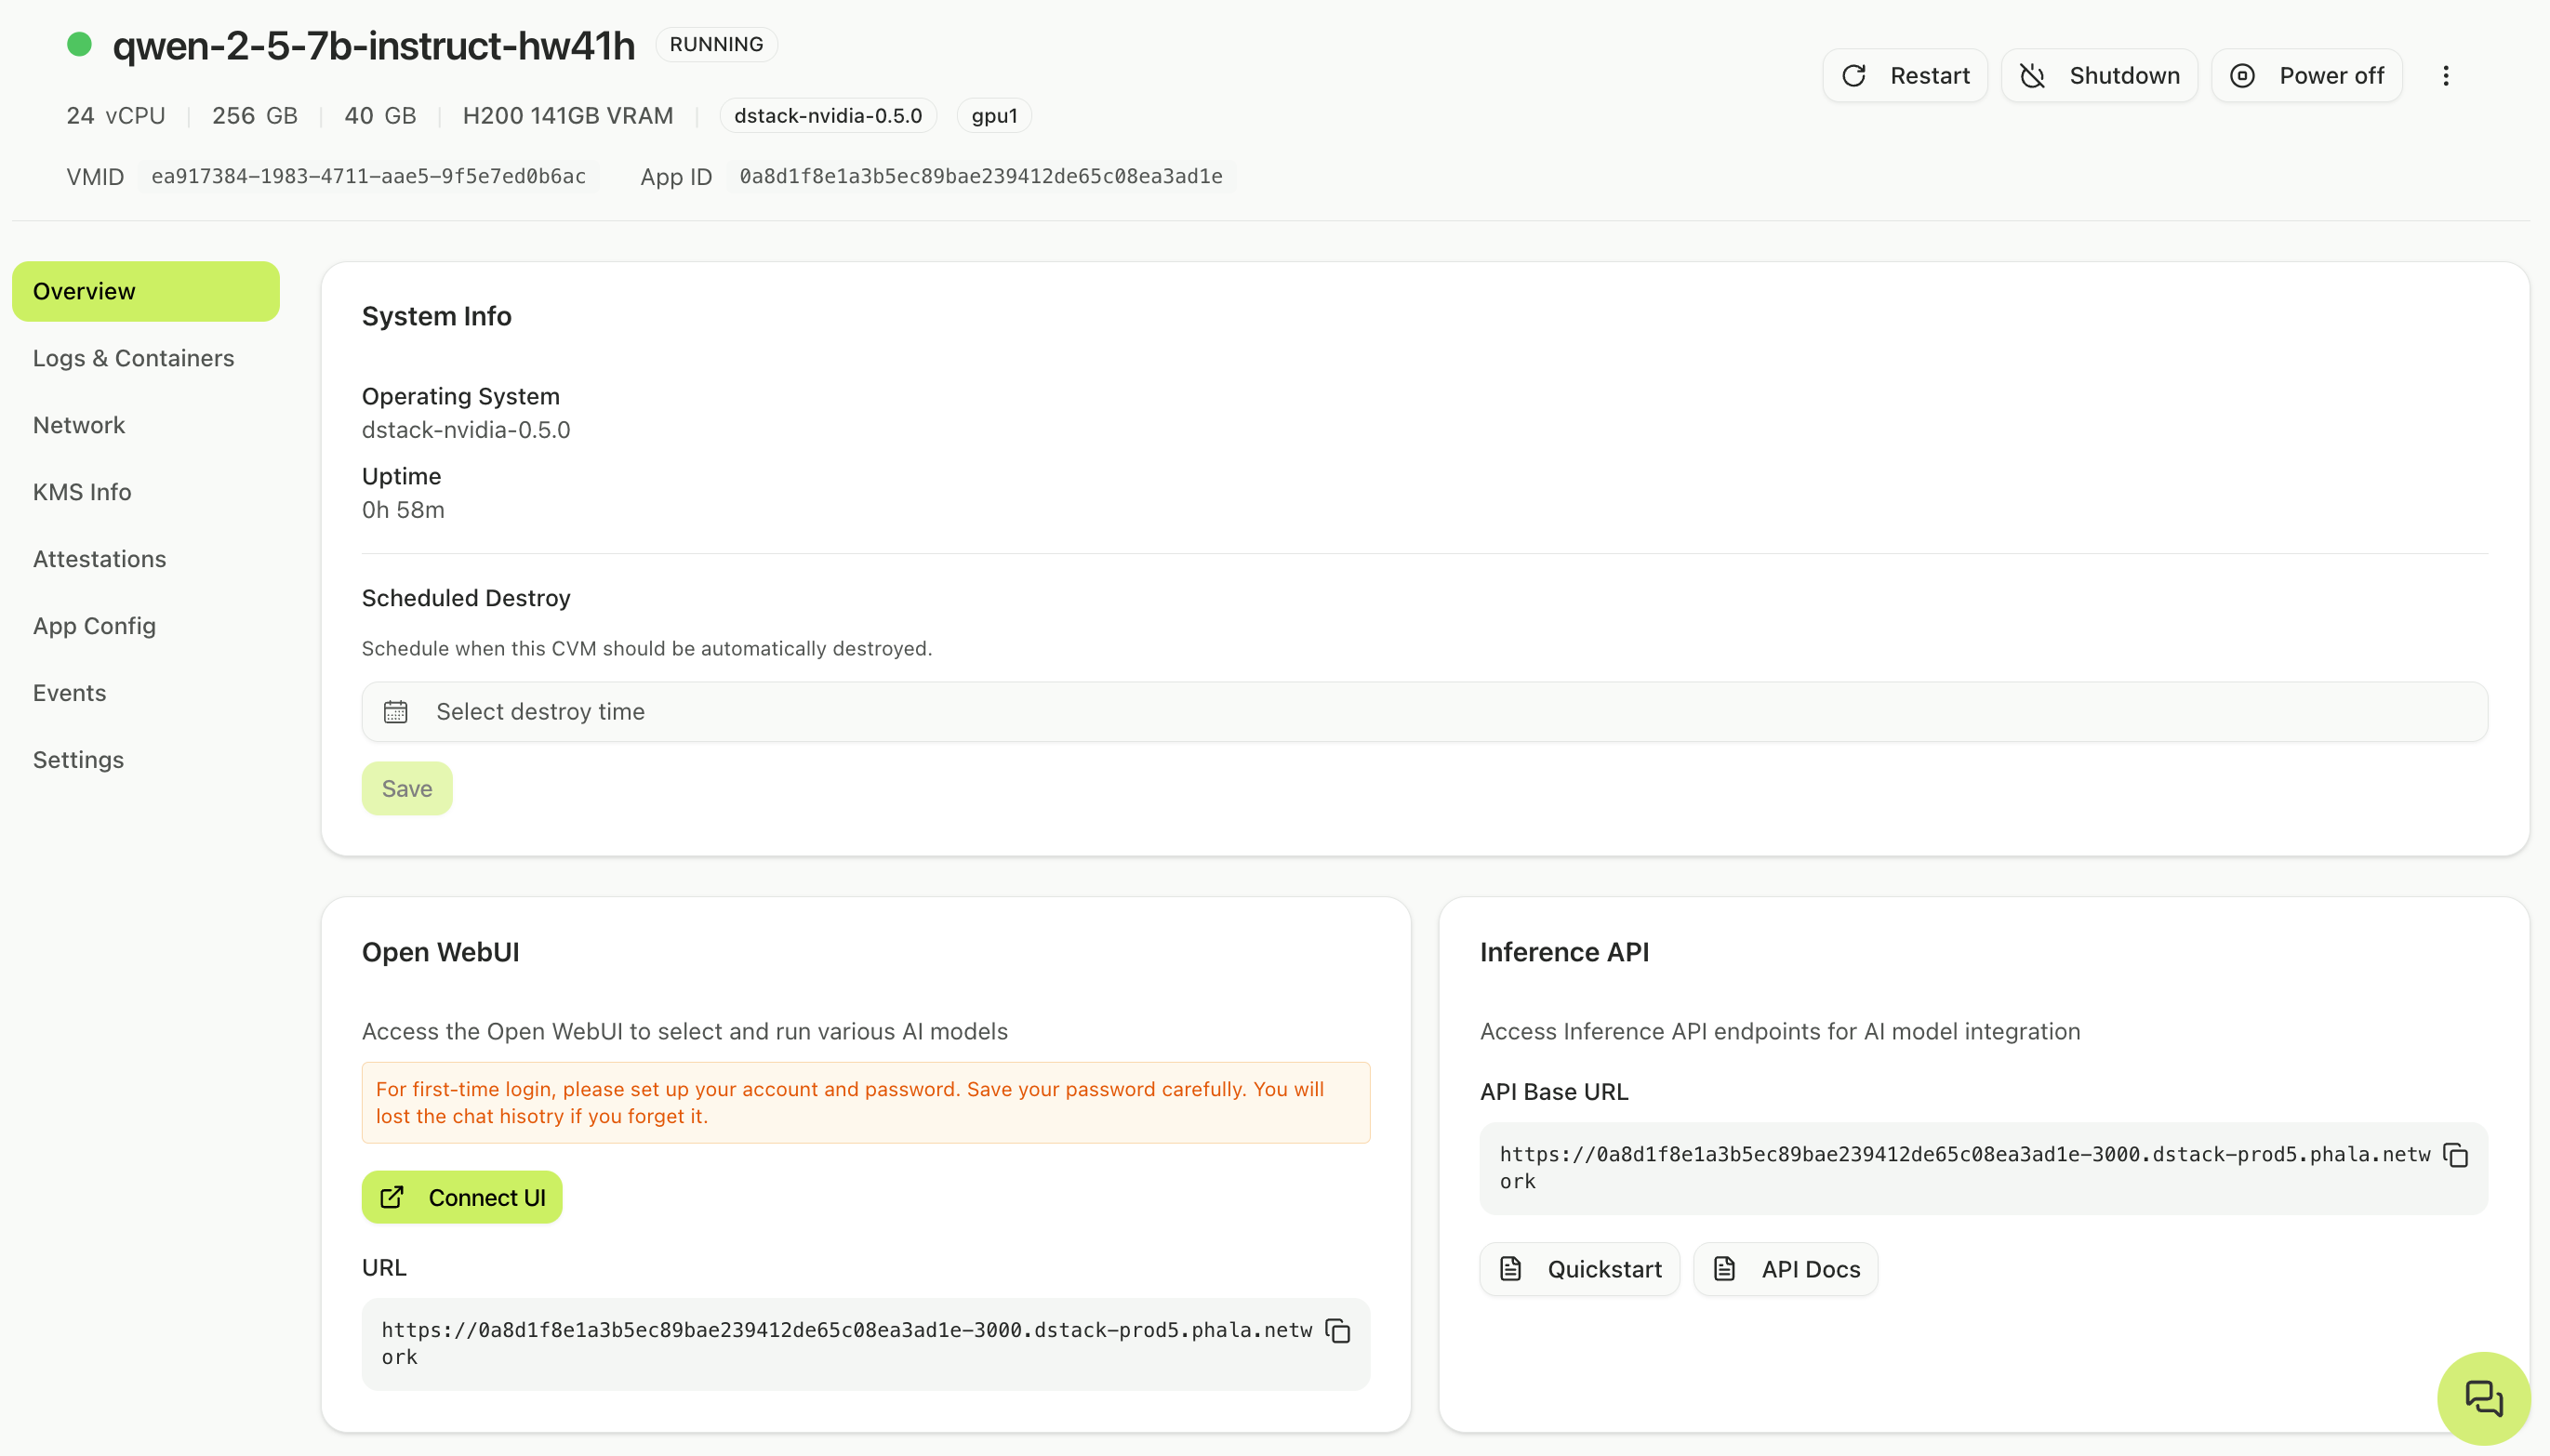
When the workload shows **RUNNING** status, a **Connect UI** button appears under the model card. The button initially reads "Initializing..." while the interface loads. Click it when active to open a new tab.
Monitor the status in the Active Workloads section on the Confidential AI Models page. Your model will progress through these states:
* **Preparing**: Allocating resources
* **Starting**: Launching the model
* **Running**: Ready to use
Billing starts when the model enters Running status. Remember to stop or schedule destruction when you no longer need the instance.
## Step 2: Access Open WebUI
Once your model reaches Running status, you can access it through Open WebUI, a browser-based chat interface.
### Open the interface
When the workload shows **RUNNING** status, a **Connect UI** button appears under the model card. The button initially reads "Initializing..." while the interface loads. Click it when active to open a new tab.
 ### Create admin account
On your first visit, create an admin account with your name, email, and password. Click **Create Admin Account** to continue.
**Critical**: Choose a strong password and store it securely. Because your model runs in a confidential environment, even we (the cloud provider) cannot access or reset your password. If you forget it, you'll lose access to all chat history permanently.
After account creation, click **Okay, Let's Go!** to access the chat interface.
## Step 3: Interact with your model
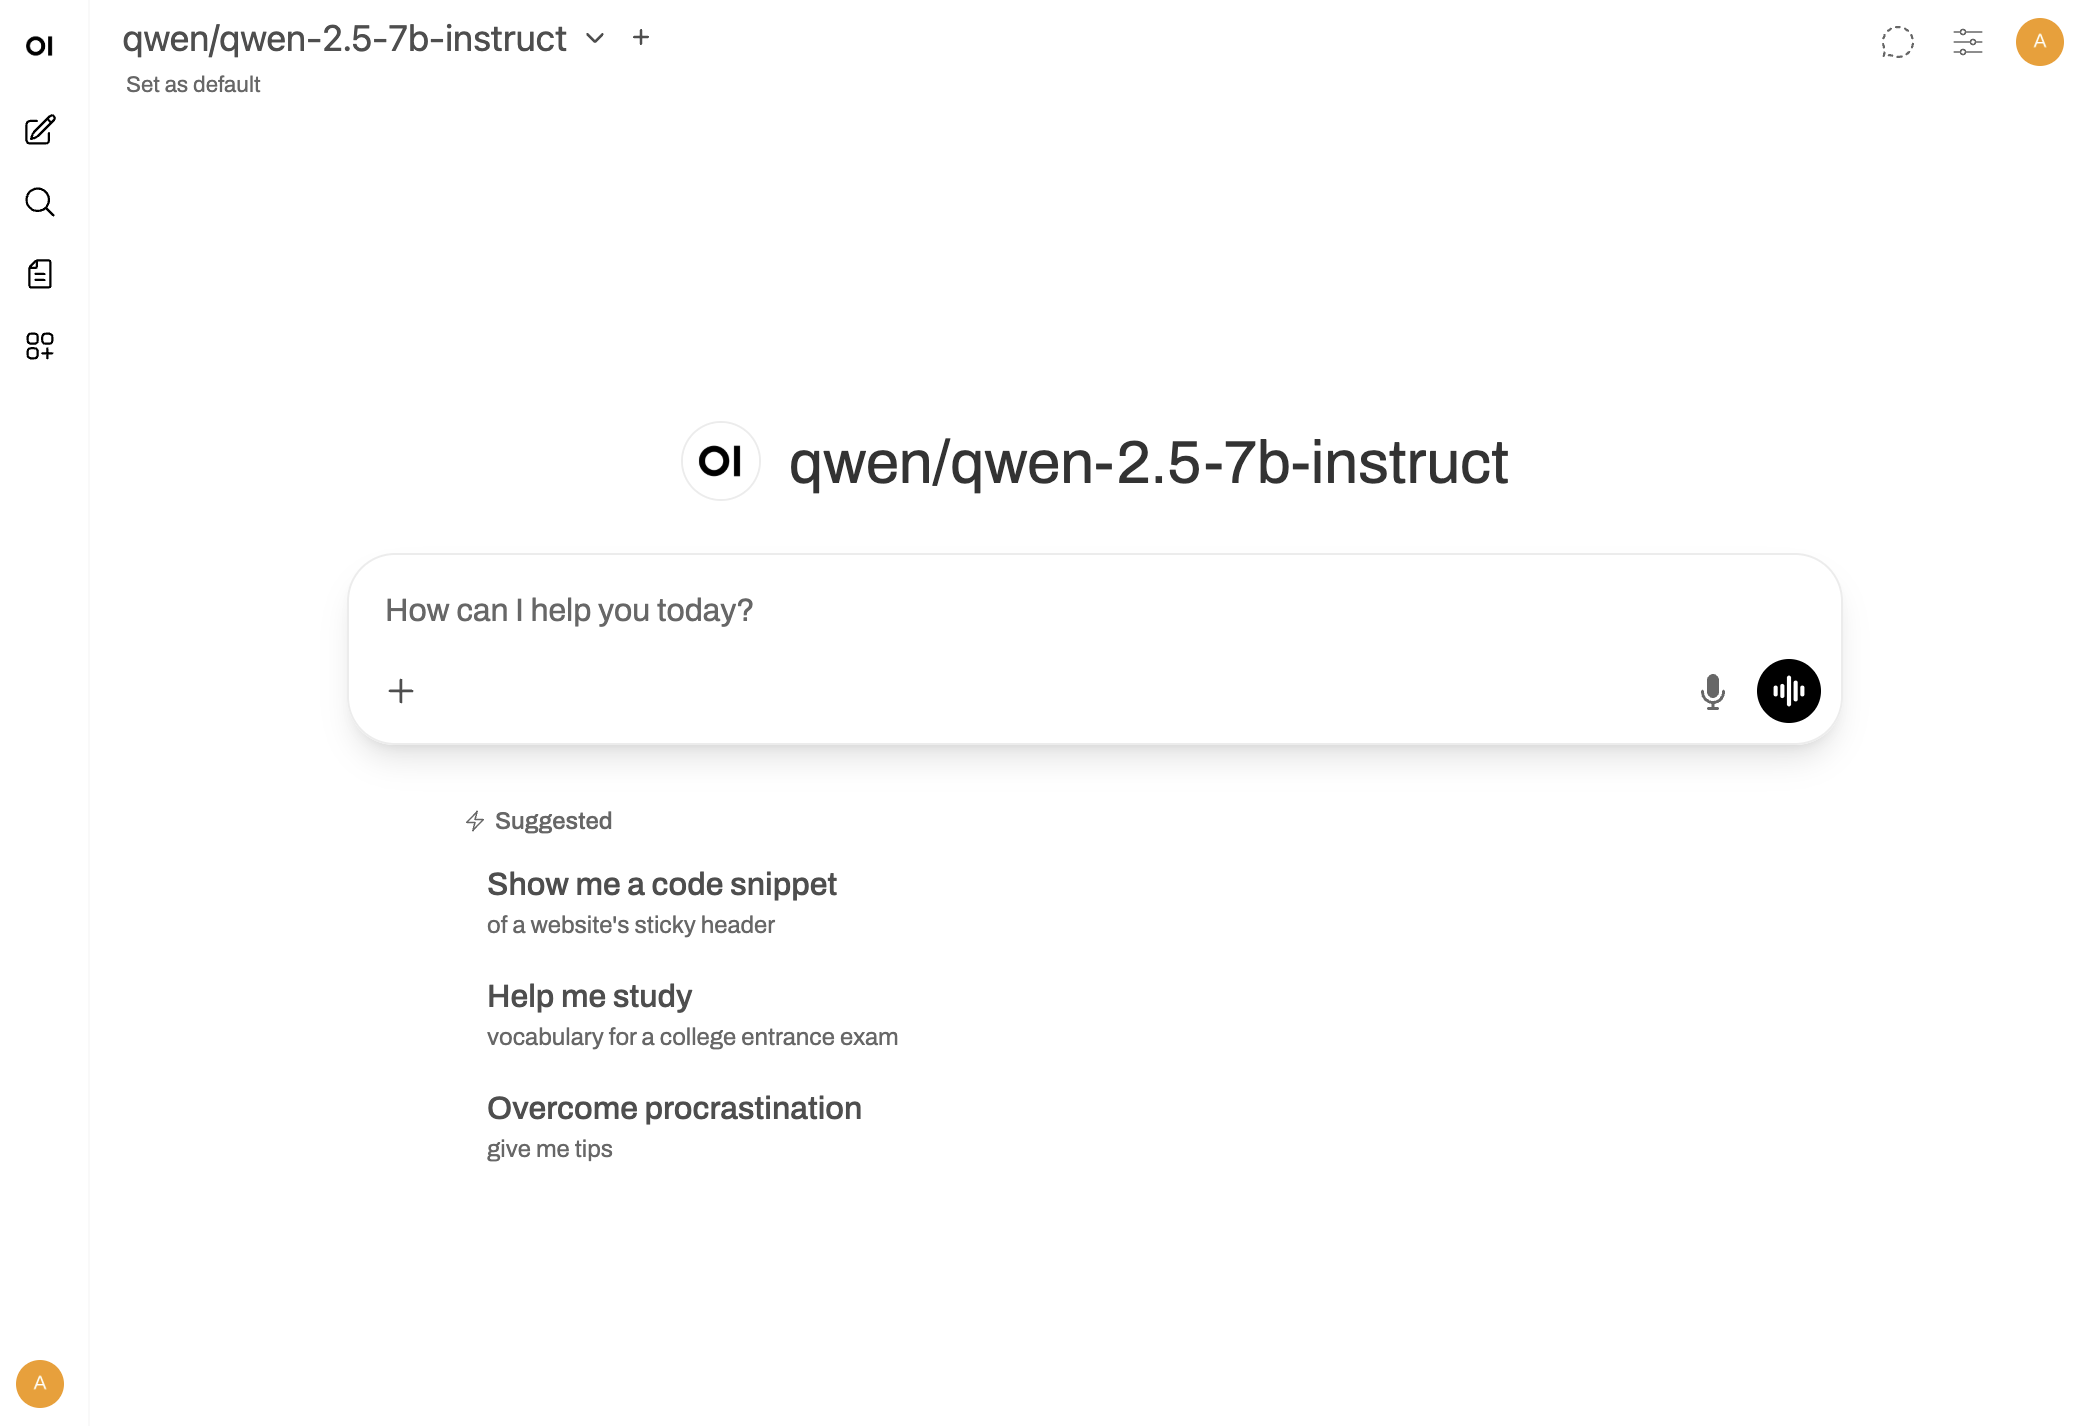
Open WebUI provides a standard chat interface. Type your questions in the prompt box, manage conversation history in the left sidebar, and use the tools menu (+) for advanced features like file uploads. The interface is intuitive and works like other chat applications you may be familiar with.
### Create admin account
On your first visit, create an admin account with your name, email, and password. Click **Create Admin Account** to continue.
**Critical**: Choose a strong password and store it securely. Because your model runs in a confidential environment, even we (the cloud provider) cannot access or reset your password. If you forget it, you'll lose access to all chat history permanently.
After account creation, click **Okay, Let's Go!** to access the chat interface.
## Step 3: Interact with your model
Open WebUI provides a standard chat interface. Type your questions in the prompt box, manage conversation history in the left sidebar, and use the tools menu (+) for advanced features like file uploads. The interface is intuitive and works like other chat applications you may be familiar with.
 ## Step 4: Access via API
Beyond the WebUI, you can access your dedicated model programmatically through a REST API.
Navigate to the **Overview** page for your running instance. In the **Inference API** section, click **Quickstart** to see example commands and integration code.
To make API calls, you'll need an API key from Open WebUI. Open the WebUI, navigate to **Settings** → **Account** → **API keys**, and create a new key. Use this key as a Bearer token in your requests.
Protect your API key like a password. Anyone with the key can access your model.
Here's a quick example for chat completions:
```bash theme={"system"}
curl -H "Content-Type: application/json" \
-H "Authorization: Bearer sk-your-api-key" \
-d '{
"model": "qwen/qwen-2.5-7b-instruct",
"messages": [
{"role": "user", "content": "Hello! Can you tell me a fun fact about space?"}
]
}' \
https:///v1/chat/completions
```
For TEE verification, your instance exposes attestation endpoints:
```bash theme={"system"}
# Get attestation report
NONCE=$(openssl rand -hex 16)
curl -H "Authorization: Bearer sk-your-api-key" \
"https:///v1/aci/attestation?nonce=$NONCE"
# Get the signed receipt for a chat completion
curl -H "Authorization: Bearer sk-your-api-key" \
"https:///v1/aci/receipts/{receipt_id_or_chat_completion_id}"
```
See [Verify Attestation](/phala-cloud/confidential-ai/verify/verify-attestation) and [Verify a Response](/phala-cloud/confidential-ai/verify/verify-signature) for how to use these endpoints to confirm your requests were processed inside a TEE.
## Managing your instance
Return to the Confidential AI Models page anytime to monitor your model:
**Overview button**: Opens a dashboard with resource metrics, logs, and attestation data.
**Connect UI button**: Always launches the Open WebUI for your model.
Billing continues while the instance is running. Stop or schedule destruction when you no longer need the model to avoid ongoing charges.
## Troubleshooting
### Connect UI button stuck on "Initializing..."
Wait 2-3 minutes after the model reaches Running status. The interface needs time to fully start. Refresh the Confidential AI Models page if the button doesn't activate.
### Cannot access Open WebUI
Verify your model status is **Running** in the Active Workloads section. Check that you're using the correct URL (should end in `dstack-prod5.phala.network`).
### Forgot admin password
We can't reset your admin password because the model is running in a confidential environment that even the cloud provider doesn't have access to. You will lose all the chat history if you forget your password.
## Next steps
You've deployed a dedicated model and accessed it through Open WebUI! Now you can:
Confirm your model runs in genuine TEE hardware
Deploy custom models with full infrastructure control
## Step 4: Access via API
Beyond the WebUI, you can access your dedicated model programmatically through a REST API.
Navigate to the **Overview** page for your running instance. In the **Inference API** section, click **Quickstart** to see example commands and integration code.
To make API calls, you'll need an API key from Open WebUI. Open the WebUI, navigate to **Settings** → **Account** → **API keys**, and create a new key. Use this key as a Bearer token in your requests.
Protect your API key like a password. Anyone with the key can access your model.
Here's a quick example for chat completions:
```bash theme={"system"}
curl -H "Content-Type: application/json" \
-H "Authorization: Bearer sk-your-api-key" \
-d '{
"model": "qwen/qwen-2.5-7b-instruct",
"messages": [
{"role": "user", "content": "Hello! Can you tell me a fun fact about space?"}
]
}' \
https:///v1/chat/completions
```
For TEE verification, your instance exposes attestation endpoints:
```bash theme={"system"}
# Get attestation report
NONCE=$(openssl rand -hex 16)
curl -H "Authorization: Bearer sk-your-api-key" \
"https:///v1/aci/attestation?nonce=$NONCE"
# Get the signed receipt for a chat completion
curl -H "Authorization: Bearer sk-your-api-key" \
"https:///v1/aci/receipts/{receipt_id_or_chat_completion_id}"
```
See [Verify Attestation](/phala-cloud/confidential-ai/verify/verify-attestation) and [Verify a Response](/phala-cloud/confidential-ai/verify/verify-signature) for how to use these endpoints to confirm your requests were processed inside a TEE.
## Managing your instance
Return to the Confidential AI Models page anytime to monitor your model:
**Overview button**: Opens a dashboard with resource metrics, logs, and attestation data.
**Connect UI button**: Always launches the Open WebUI for your model.
Billing continues while the instance is running. Stop or schedule destruction when you no longer need the model to avoid ongoing charges.
## Troubleshooting
### Connect UI button stuck on "Initializing..."
Wait 2-3 minutes after the model reaches Running status. The interface needs time to fully start. Refresh the Confidential AI Models page if the button doesn't activate.
### Cannot access Open WebUI
Verify your model status is **Running** in the Active Workloads section. Check that you're using the correct URL (should end in `dstack-prod5.phala.network`).
### Forgot admin password
We can't reset your admin password because the model is running in a confidential environment that even the cloud provider doesn't have access to. You will lose all the chat history if you forget your password.
## Next steps
You've deployed a dedicated model and accessed it through Open WebUI! Now you can:
Confirm your model runs in genuine TEE hardware
Deploy custom models with full infrastructure control